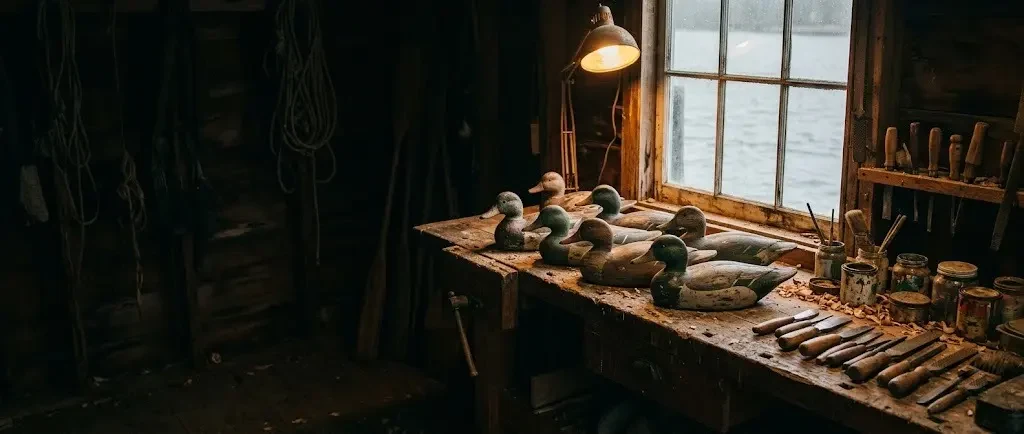
 AI illustration
Decoy carving
Carve and paint a wooden duck the old working way: plain, sturdy shapes and bold paint. American folk art you can float.
What it is like
Decoys began as equipment. Carved wooden decoys arose in North America in the 19th century as working tools for waterfowl hunters, made to be weighted, floated and set out in all weathers. Only later did collectors notice that the best of them were sculpture.
A working decoy is a rounded body, a separate head set at a chosen angle, and paint in a few strong blocks. That makes it a generous first carving: the shapes are large, mistakes sand out, and the paint hides a lot.
The oldest known North American decoys are birds of tule and duck feathers found in Lovelock Cave, Nevada, dated to about 300 to 100 BCE. Decorative carving, with burned feathers and thin washes, grew out of the same tradition and answers a different question.
Most carvers learn the craft in the same order as the bird is made. The body teaches shape: an egg-like cross-section, a low tail and a full chest, checked from the front and from above as often as from the side. The head teaches grain and posture, because a bill carved across the grain snaps and the angle of the neck decides whether the bird reads as feeding, resting or alert. Paint comes last and teaches restraint - a few flat blocks of color look more like a duck at a distance than a hundred painted feathers.
Collectors sort decoys into working, decorative, antique and contemporary birds, and by region, since many waterfowl areas had their own carving styles. Visiting a decoy museum or show is the quickest way to see what those styles look like and to train the eye before the next bird.
- A session
- Two to three hours of carving at a time; paint goes on in short sessions as coats dry.
- A week
- A decoy over two or three weekends, or several evenings.
- Season
- All year; many clubs hold shows and competitions in spring and autumn.
Indoors or out · Solo, A club
Kinds and styles
Plain, sturdy birds made to be weighted, floated and used, with bold paint that reads at a distance. The style on this page.
Light cork bodies with wooden heads and bottom boards; quick to shape with a rasp and very buoyant.
Smooth display birds with more careful painting, made for shelves rather than water.
Realistic carvings with burned and textured feathers and thin layered paint, judged at competitions.
Small birds on sticks - plovers, yellowlegs and curlews - now carved mostly as folk-art pieces.
Palm-sized ducks and songbirds, carved with a knife alone; good practice for shape and paint.
Is it for you?
You will probably love it if
- You like whittling and want a bigger subject
- You enjoy painting as much as carving
- Bold shapes suit you better than fine detail
Maybe not, if
- You want feather-perfect realism in month one
- Wood chips indoors are not acceptable
- You dislike sharp tools near your hands
What to buy first
- 01Bandsawn duck blank, basswood, about 8 inchThe outline is already cut, so no bandsaw is needed. A full-size cork body with a head costs about three times as muchFind it on Amazon$20
- 02Sloyd-style carving knifeDoes the rounding and most of the headFind it on Amazon$18
- 03Four-in-hand raspTakes the body from blocky to bird quicklyFind it on Amazon$13
- 04Cut-resistant gloveFor the hand that holds the workFind it on Amazon$15
- 05Acrylic paint set and a flat brushFlat colors; gloss flares birds off and looks wrongFind it on Amazon$14
- Everything you need to beginAbout $10 a month after that$80
Typical US prices for entry-level gear, rounded. Last checked October 2026. How we get the numbers
The Amazon links open a search for that type of item, not a product chosen for us, and the prices in the list are our typical figures, or the listing of the shop a line names, not Amazon's price for any listing. If you buy through one we may earn a commission at no extra cost to you; as an Amazon Associate we earn from qualifying purchases.
What to buy next
- 01Glass eyesBring a carving to life; sized to the speciesFind it on Amazon Second bird onwards
- 02Carving gougesA small set for the head and around the billFind it on Amazon Hollowing and detail
- 03SpokeshaveFast, smooth shaping of a body's curvesFind it on Amazon Larger bodies
- 04Waterfowl reference bookClear photos of plumage beat memoryFind it on Amazon Painting
- 05Cedar or tupelo blanksLighter, more buoyant or more detail-friendly than basswoodFind it on Amazon Working decoys
- 06Wood burning penFor burned feather lines on decorative birdsFind it on Amazon Feather texturing
No prices here on purpose: these are later buys, and what to spend depends on how far the hobby has taken you. The Amazon links work like the ones above: a search for the type of item, and a possible commission for us at no extra cost to you.
From a bandsawn blank to a painted working decoy, step by step
Decoys are old: tule-and-feather decoys found in Lovelock Cave in Nevada date to about 300-100 BCE, and carved wooden decoys flourished in North America in the 19th and 20th centuries, often in Atlantic white cedar or cork (Wikipedia). This guide goes from choosing a blank to rounding the body, carving the head, priming and painting, with the choices at each step.
Warning: Before you start Carve with a cut-resistant glove on the holding hand and cut away from the body. Sand and rasp with a dust mask. An old decoy found in a barn can be worth far more untouched: do not clean, repaint or repair one before asking someone who knows.
Pencil a line down the back and around the sides of the blank. Carve toward the lines, never through them.
Knife and rasp the corners down until the cross-section is an egg, low at the tail and full at the chest.
Keep the bill and neck thick until the end, and check that the grain runs along the bill. On a two-piece bird the head is carved separately, then doweled and glued on. A low head reads as feeding, a high one as alert.
Sand lightly, leaving some tool marks, then prime everything.
Green head, white ring, chestnut breast, gray sides, black rump. Strong shapes that read at a distance, in flat paint.
One mallard drake
The finished drake from the side, and its body cut across.
- A Cross-section Egg-shaped Low at the tail, full at the chest. Step 4 →
- B Head Green Grain along the bill; kept thick until the end. Step 5 →
- C Rump Black Flat blocks read at a distance. Step 7 →
- D Sides Grey Over primer; some tool marks left. Step 7 →
- E Breast Chestnut Below the white ring. Step 7 →
Steps 1-2Blank and tools
- Step 1 of 8 · Blank and tools
Choose a blank
Warning: CAUTION Carve with a cut-resistant glove on the holding hand, cut away from the body, and wear a dust mask for rasping and sanding.
A bandsawn blank has the outline already cut, so no bandsaw is needed.
Most people: basswood blank, about 8 in (a first decoy).
Start here Basswood blank, about 8 inBest forA first decoy
Soft, even and easy to shape with knife and rasp.
Cork body with a wooden headBest forLight, buoyant birds
Quick to rasp; the traditional cork decoy.
- Step 2 of 8 · Blank and tools
Choose the pose
Wikipedia notes decoys come in forms such as feeders and sleepers, and that working decoys are weighted to stay anchored. A low head reads as feeding, a high one as alert.
Most people: alert, head up (the classic mallard).
Start here Alert, head upBest forThe classic mallard
The pose most first decoys take.
Feeder or sleeperBest forVariety in a rig
Head down feeding, or tucked back.
Steps 3-5Carving
- Step 3 of 8 · Carving
Mark the centre lines
Pencil a line down the back and around the sides. Carve towards the lines, never through them.
Goes wrong: A lopsided body. A decoy off its centre line rolls in the water; check it from the front.
- Step 4 of 8 · Carving
Round the body
Knife and rasp the corners down until the cross-section is egg-shaped, low at the tail and full at the chest.
Goes wrong: Carving too thin too early. Wood cannot go back on; leave extra and creep up on the shape.
- Step 5 of 8 · Carving
Carve the head
Keep the bill and neck thick until the end, with the grain running along the bill. On a two-piece bird the head is carved separately, then doweled and glued on.
Goes wrong: Bill across the grain. Short grain snaps.
Steps 6-8Painting and next
- Step 6 of 8 · Painting and next
Sand and prime
Sand lightly, leaving some tool marks, then prime everything.
Goes wrong: Skipping primer. Bare wood soaks up paint unevenly.
- Step 7 of 8 · Painting and next
Paint in bold blocks
For a mallard drake: green head, white ring, chestnut breast, grey sides, black rump - strong, flat shapes that read at a distance. Wikipedia notes black decoys show up better to ducks on overcast days.
Goes wrong: Gloss paint. It flares and looks wrong; use flat colours.
- Step 8 of 8 · Painting and next
Choose where to go next
Warning: NOTICE An old decoy found in a barn can be valuable as it is: Wikipedia records antique decoys selling for over a million dollars. Do not clean, repaint or repair one before asking someone who knows.
Wikipedia notes decoys are now collected as North American folk art, from working birds to decorative ones.
Most people: more working decoys (a full rig).
Start here More working decoysBest forA full rig
Plain, sturdy birds weighted and floated.
Decorative birdsBest forShelves and shows
Smoother bodies and finer painting.
MiniaturesBest forPractice
Palm-sized birds carved with a knife alone.
In shortIf it goes wrong
- A lopsided body.
- Step 3 · Mark the centre lines
- Carving too thin too early.
- Step 4 · Round the body
- Bill across the grain.
- Step 5 · Carve the head
- Skipping primer.
- Step 6 · Sand and prime
- Gloss paint.
- Step 7 · Paint in bold blocks
How you get better
- First birdA mallard from a blank
Rounding a bandsawn blank, carving the head and painting in flat blocks.
- Birds 2 to 4Other species and head poses
A pintail, a bluebill or a goose; feeding, resting and alert heads; glass eyes.
- Months 3 to 6A working decoy
Cedar or cork bodies, keels and weights, and floating it in a tub to check how it sits.
- Months 6 to 12Painting skill
Wet blending, combing for vermiculation and softer feather patterns, from reference photos.
- After thatDecorative birds and shows
Burned and textured feathers, decorative pieces and entering local shows or the Ward World Championship.
- Reading grain
- Laying out a pattern
- Knife and rasp shaping
- Carving a head
- Setting the head angle
- Doweling and gluing
- Sanding and priming
- Block painting
- Blending and combing paint
- Setting glass eyes
- Weighting and keels
- Burning and texturing feathers
Small things that help
- Keep the bill and neck thick until the very end.
- Lay patterns out with the grain running along the bill.
- Look at the bird from the front and from above as often as from the side.
- Paint from a reference photo, not memory.
- Use flat paint; gloss looks wrong on a duck.
- Float a working decoy in a tub before painting so you can add weight where it lists.
Beginner mistakes
- 01Bill across the grainShort grain snaps. Turn the head pattern so the grain runs along the bill.
- 02Carving too thin too earlyWood cannot go back on. Leave extra and creep up on the shape.
- 03Lopsided bodyA body off its center line rolls in the water. Mark center lines and check from the front.
- 04Skipping primerBare wood soaks up paint unevenly. Prime first.
- 05Cleaning an old decoyOriginal paint and wear are where an antique's value lies. Ask before touching one.
Carving woods
| Wood | Character | Used for |
|---|---|---|
| Atlantic white cedar | Light, buoyant, rot-resistant, soft | Traditional working bodies |
| Basswood | Even grain, holds detail | Heads and decorative birds |
| Tupelo | Carves cleanly, heavier | Decorative carving |
| Cork | Very light, takes shot without splitting | Working bodies with wooden heads |
Why people quit
- 01A snapped billGrain running across the bill or neck breaks. Lay the head pattern out with the grain along the bill.
- 02Chasing realismA gunning decoy is impressionist. Feather detail is a different craft; do it later.
- 03Shiny paintGloss ruins the look. Use flat colors.
Words you will meet
- Blank
- A block of wood, often already bandsawn to the outline.
- Working decoy
- A decoy made to be used on water.
- Gunning decoy
- Another name for a working decoy used in hunting.
- Decorative decoy
- A decoy carved and painted for display.
- Rig
- A hunter's set of decoys.
- Keel
- A strip under the body that keeps the decoy upright and tracking.
- Vermiculation
- Fine, wavy feather markings, often painted by combing.
- Speculum
- The bright patch on a duck's wing.
- Hen and drake
- Female and male ducks.
- Feeder and sleeper
- Decoys carved in feeding or resting poses.
Questions people ask
Which wood should I start with?
Basswood is even-grained and carves easily; Atlantic white cedar and cork are traditional for working birds that float.
Do I need a bandsaw?
No. Pre-cut blanks are sold with the outline already sawn, and the rest is knife and rasp work.
Will my decoy float?
A solid basswood bird floats, but sits better with a keel and weight; working decoys are often hollowed or made of cedar or cork.
How do I paint feathers?
Start with flat blocks of color like the old working birds; blending, combing and burned feather detail come later.
Are old decoys valuable?
Some are very valuable, and original paint matters. Do not clean or repaint one before asking a knowledgeable collector or museum.
Where to go next
- 01Game call makingThe other half of the duck blind: making the call. $51 to start
- 02WhittlingSmall carved birds with a knife alone. $52 to start
How it compares
| Decoy carving | Whittling | Game call making | Birdwatching | |
|---|---|---|---|---|
| Start cost | $80 | $52 | $51 | $161 |
| Each month | $10 | $5 | $12 | Free |
| Space | A bench or a porch | A chair | A workbench | Anywhere outside |
| Noise | Low | Quiet | Loud | Quiet |
| First result | 2 weekends | 1 evening | 1 weekend | Same day |
| Mess | Chips and paint | Shavings | Shavings | None |
Where to learn more
- 01Ward FoundationThe foundation behind the Ward World Championship, with a large collection of antique decoys.
- 02Havre de Grace Decoy MuseumA museum on the Susquehanna Flats devoted to working decoys and their carvers.
Sources: Wikipedia, Duck decoy (model) · Wikipedia, Museum of Eastern Shore Culture (Ward Museum)
Researched and written by the Fjords Team.