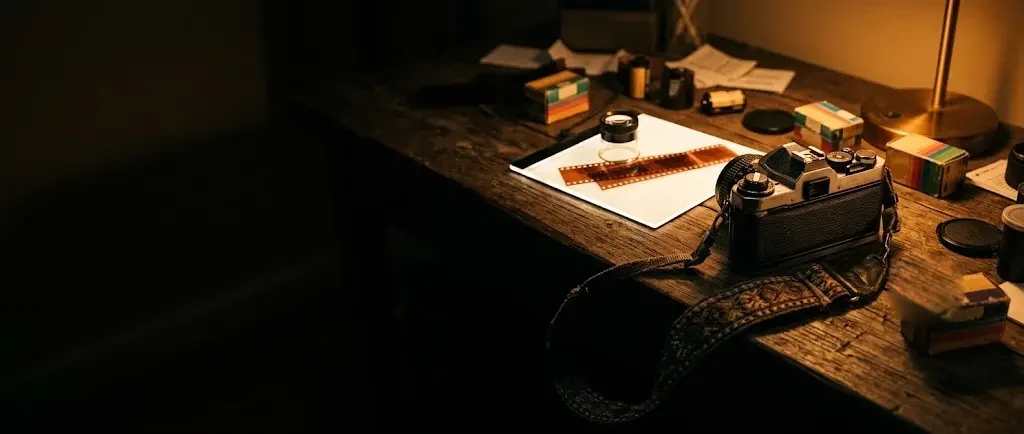
 AI illustration
Film photography
A used 35mm camera, a roll of film and a week's wait for the scans. Every frame costs money, which is exactly what makes you look before you press.
What it is like
Film photography is taking pictures on a roll of light-sensitive film in a camera made before anyone had a phone, then sending the roll to a lab and waiting. Thirty-six frames, each with a cost, each a decision about light and distance made with three dials and no screen. The scans come back a week later and some of them are better than anything the phone has made.
It is listed under collecting because that is how it usually goes: the first camera leads to a second, then a lens, then a rangefinder found at a market. The gear is cheap and mostly mechanical, and the pleasure is as much in the handling as in the pictures. The real cost is the film and the lab, which is why the hobby teaches patience whether you wanted it to or not.
Film works because of tiny light-sensitive silver crystals. A brief exposure through the lens leaves an invisible image on them, and developing turns that into a visible negative, with tones reversed, ready to scan or print. Everything the camera’s three dials do - aperture, shutter speed and the ISO you set to match the film - is about giving those crystals the right amount of light, and the Sunny 16 rule is the old way of getting it close without a meter.
Most people start with color negative film because it is forgiving and any lab can develop it. Black and white is where many go next, often because it is easy to develop at home in a small tank at the sink. From there the hobby branches: older and wider cameras, slide film, darkroom prints or just a favorite camera and a favorite film, shot slowly for years.
- A session
- A walk with the camera of an hour or an afternoon; a roll often lasts a week or more.
- A week
- One roll every week or two, plus a lab trip or a developing evening.
- Season
- All year; long summer light is easiest, low winter light the best teacher.
Indoors or out · Solo, For two
Kinds and styles
Through-the-lens viewing and interchangeable lenses on mechanical bodies from the 1970s and 80s. The usual first camera.
Smaller, quieter cameras focused with a rangefinder or automatically; good for street and travel.
Wider 120 roll film in folding, twin-lens or box cameras, with fewer, larger frames per roll.
Polaroid and Instax prints that develop in minutes; dearer per shot but no lab.
Developing your own black and white rolls in a light-tight tank at the kitchen sink.
Enlarging negatives onto paper under a safelight; the classic next step for many black and white shooters.
Is it for you?
You will probably love it if
- You take a lot of phone pictures and keep almost none
- You like old mechanical things that still work
- You enjoy waiting for a result and being surprised by it
Maybe not, if
- The running cost is a problem; every roll is a tenner plus the lab
- You want instant feedback and a hundred tries at every shot
- You want perfect images; film is grain, dust and the odd ruined frame
What to buy first
- 01Used 35mm SLR with a 50mm lensA manual-focus body from the 1970s or 80s, bought tested from a shop that offers a warranty$135
- 02Three rolls of color negative film, ISO 200 or 400Forgiving of exposure mistakes; the first rolls are for learningFind it on Amazon$31
- 03Developing and scanning the first rollA lab does the chemistry; you get the negatives and a folder of scans$15
- 04Batteries and a strapMost old bodies need a small cell for the light meterFind it on Amazon$12
- Everything you need to beginAbout $25 a month after that$193
Typical US prices for entry-level gear, rounded. Last checked October 2026. How we get the numbers
The Amazon links open a search for that type of item, not a product chosen for us, and the prices in the list are our typical figures, or the listing of the shop a line names, not Amazon's price for any listing. If you buy through one we may earn a commission at no extra cost to you; as an Amazon Associate we earn from qualifying purchases.
What to buy next
- 01Black and white filmCheaper to develop at home and teaches light and contrastFind it on Amazon After two color rolls
- 02Developing tank and changing bagLoad film in the dark, then develop in daylightFind it on Amazon Developing at home
- 03Handheld light meterAccurate readings for any cameraFind it on Amazon Cameras with dead meters
- 04Lens hood and UV filterLess flare and a guard for an old lensFind it on Amazon Shooting outdoors
- 05Negative sleeves and a binderArchival storage so negatives stay clean and findableFind it on Amazon After a few rolls
- 06Second lensA wide 28 or 35mm, or a short telephoto, for the same mountFind it on Amazon When the 50mm feels limiting
No prices here on purpose: these are later buys, and what to spend depends on how far the hobby has taken you. The Amazon links work like the ones above: a search for the type of item, and a possible commission for us at no extra cost to you.
Classic film SLRs for a first camera
The kit above starts with a used manual-focus SLR from the 1970s or 80s. Four of the classic bodies, and one difference worth knowing before you buy: whether each one works without a battery.
| Model | Type | Specs | Who it suits | Links |
|---|---|---|---|---|
| Pentax K1000 | Mechanical 35mm SLR, made 1976-1997 | Almost all-metal, mechanically controlled, manual focus and manual exposure; works with no battery at all, which only powers the light meter; the meter has no off switch, so keep the lens cap on when it is stored | Learning exposure by hand on a camera that still shoots with a dead battery | Find it on AmazonWikipedia |
| Canon AE-1 | Electronic 35mm SLR, made 1976-1984 | Automatic exposure, the camera setting the aperture; shutter 2 s to 1/1000 s; 590 g; will not work at all without its battery (4LR44 or 4SR44), shutter included | Someone who wants the camera to help with exposure, and will carry a spare battery | Find it on AmazonWikipedia |
| Nikon FM2 | Mechanical 35mm SLR, made 1982-2001 | Mechanical shutter from 1 s to 1/4000 s; flash sync 1/200 s (1/250 s on the later FM2n); works without batteries, which only run the light meter | A mechanical body with a top shutter speed of 1/4000 s | Find it on AmazonWikipedia |
| Olympus OM-1 | Mechanical 35mm SLR, made 1972-1988 | All-mechanical; the shutter speed dial sits around the lens mount, so you can change speed without taking the camera from your eye | An all-mechanical body with the speed dial at the lens | Find it on AmazonWikipedia |
How we put this together. Four used classics compared from their Wikipedia articles, since their makers stopped producing them years ago; the makers of new film cameras we tried (Ilford, Lomography, Reto) answered with a bot check, so new cameras are not in this table. As the kit says, buy a used body tested, from a shop that offers a warranty. We have not shot them side by side. Checked on 26 October 2026. There are no prices in this table: the Amazon link searches for the exact model, and we may earn a commission if you buy through it.
From a used camera to your first roll of scans, step by step
Film makes every frame a decision. This guide goes from choosing a camera and film to exposing, loading, shooting a roll and getting it developed, with the choices at each step. Exposure follows the Sunny 16 rule as Wikipedia sets it out.
Warning: Before you start Nothing hazardous, unless you move to home developing, where the chemicals need gloves, ventilation and proper disposal. Flying, keep undeveloped film and loaded cameras in your carry-on and ask for a hand inspection at security, as the US TSA recommends.
Aperture on the lens, shutter speed on the top, ISO set once to match the film. Read the manual; it is online for every common camera.
In shade, pull the leader across to the take-up spool, close the back, wind on two frames. Check the rewind knob turns as you advance: that means the film is moving.
Center the needle or the lights in the viewfinder, focus until the split image lines up, breathe out, press. Then stop. Thirty-six frames should take a week, not an afternoon.
Frame number, subject, aperture, shutter. When the scans come back, the notes explain every success and every mistake.
Rewind fully before opening the back. Post or drop the roll at a lab with scanning. The envelope of results is the hobby's best moment.
Sunny 16 at a glance
The same post under six kinds of light; read the shadow, set the aperture.
- A Snow or sand f/22 Dark, sharp shadows.
- B Bright sun f/16 Clearly defined shadows.
- C Slight overcast f/11 Soft-edged shadows.
- D Overcast f/8 Shadows barely visible.
- E Heavy overcast f/5.6 No shadows.
- F Open shade, sunset f/4 No shadows.
Steps 1-3Camera and film
- Step 1 of 9 · Camera and film
Choose a camera
A used camera bought tested, from a shop that offers a warranty: old light seals leak and shutters stick. Find its manual online - there is one for every common model.
Most people: 35mm SLR with a 50mm lens (a first camera).
Start here 35mm SLR with a 50mm lensBest forA first camera
Through-the-lens viewing and manual controls, from the 1970s or 80s.
Rangefinder or compactBest forStreet and travel
Smaller and quieter, focused by rangefinder or automatically.
Medium formatBest forLarger negatives
120 roll film and fewer, larger frames per roll.
Instant filmBest forNo lab
Prints develop in minutes; dearer per shot.
- Step 2 of 9 · Camera and film
Choose the film
Standard 35mm film gives 24 x 36 mm frames, usually 36 or 24 to a roll; common colour films run from ISO 100 to 800, slower films giving finer pictures and faster ones working in low light (Wikipedia).
Most people: colour negative, ISO 200-400 (first rolls).
Start here Colour negative, ISO 200-400Best forFirst rolls
Forgiving of exposure mistakes; any lab develops it.
Black and whiteBest forDeveloping at home
Can be developed in a tank at the kitchen sink.
Slide (reversal) filmBest forLater
Rich colour but little room for exposure error.
Not for a first try - Step 3 of 9 · Camera and film
Learn the three settings
Aperture on the lens, shutter speed on the top, and the film's ISO set once when you load it.
Goes wrong: The wrong ISO setting. A camera left on the last film's speed exposes a whole roll wrongly.
Steps 4-7Shooting a roll
- Step 4 of 9 · Shooting a roll
Expose with the meter or Sunny 16
Centre the needle or lights in the viewfinder. Without a meter, the Sunny 16 rule: in bright sun, f/16 with the shutter speed nearest the ISO - 1/125 for ISO 100, 1/250 for ISO 200, 1/500 for ISO 400 - then open up for less light: f/11 in slight overcast, f/8 overcast, f/5.6 heavy overcast, f/4 in open shade (Wikipedia). Each stop of aperture trades for halving or doubling the shutter time.
- Step 5 of 9 · Shooting a roll
Load the film
In shade, pull the leader across to the take-up spool, close the back and wind on two frames. Watch the rewind knob turn as you advance: that means the film is moving.
Goes wrong: Film that never advanced. A leader that slipped means a blank roll.
- Step 6 of 9 · Shooting a roll
Shoot slowly and keep notes
Focus until the split image lines up, breathe out, press. Note the frame number, subject, aperture and shutter speed: when the scans come back, the notes explain every success and mistake. Thirty-six frames should take a week, not an afternoon.
Goes wrong: Shooting too fast. Thirty-six snapshots cost as much as thirty-six good pictures.
- Step 7 of 9 · Shooting a roll
Rewind before opening
At the end of the roll, rewind fully until the leader is back in the cassette, then open the back.
Goes wrong: Opening the back mid-roll. Light ruins every frame already shot.
Steps 8-9Developing
- Step 8 of 9 · Developing
Get it developed
Warning: NOTICE Home developing chemicals need gloves, ventilation and disposal as their labels direct.
Post or drop the roll at a lab that scans, or develop black and white yourself. Flying with film, the US TSA recommends carrying undeveloped film in your carry-on and asking for a hand inspection.
Most people: lab with scanning (colour film).
Start here Lab with scanningBest forColour film
You get the negatives and a folder of scans.
Home developingBest forBlack and white
A light-tight tank and chemicals at the sink.
- Step 9 of 9 · Developing
Choose a next step
After a few rolls, most people go deeper in one direction.
Most people: a second lens (your own style).
Darkroom printingBest forBlack and white
Enlarging negatives onto paper under a safelight.
Medium formatBest forDetail
Bigger negatives from 120 film.
Start here A second lensBest forYour own style
A wide or short telephoto for the subjects you keep coming back to.
In shortIf it goes wrong
- The wrong ISO setting.
- Step 3 · Learn the three settings
- Film that never advanced.
- Step 5 · Load the film
- Shooting too fast.
- Step 6 · Shoot slowly and keep notes
- Opening the back mid-roll.
- Step 7 · Rewind before opening
How you get better
- First rollColor negative film and notes
A tested camera, a forgiving ISO 200 or 400 film, and a note for every frame.
- Rolls 2 to 5Exposure on purpose
Sunny 16 checks, shooting into shade and backlight, and seeing what the notes explain.
- Months 2 to 4Black and white and other stocks
A black and white roll, a slide film or a slower film, and a second lens.
- Months 4 to 12Developing at home
A tank, a changing bag and black and white chemistry, with scans from a flatbed or a camera.
- After thatFormats and darkroom
Medium format, a rangefinder, darkroom prints, and long projects shot on film.
- Aperture, shutter speed and ISO
- Loading and rewinding
- Reading a light meter
- Sunny 16
- Manual focusing
- Depth of field
- Composition without a screen
- Keeping exposure notes
- Choosing film stocks
- Developing black and white
- Scanning negatives
- Testing and servicing old cameras
Small things that help
- Buy a tested camera from a seller with a return policy.
- Write the film type and ISO on a note taped to the camera back.
- Shoot a whole roll of one subject or one light to learn faster.
- Check the camera meter against Sunny 16 on a bright day; an old meter can drift.
- Rewind completely before opening the back.
- Keep film cool and out of the sun, and process it soon after shooting.
Beginner mistakes
- 01Opening the back mid-rollLight ruins the frames already shot. Rewind first, every time.
- 02Film that never advancedA leader that slipped means a blank roll. Watch the rewind knob turn as you wind on.
- 03Wrong ISO settingA camera set to the last film's speed exposes a whole roll wrongly. Set it when loading.
- 04Shooting too fastThirty-six snapshots cost as much as thirty-six good pictures. Slow down.
- 05Untested camerasLeaking light seals and sticky shutters spoil rolls. Test or buy tested.
Sunny 16: exposure without a meter
Set the shutter speed closest to 1 over the film's ISO, then pick the aperture from the light. A 1980s meter is often fine; this is the check on it.
| Light | Shadows look | Aperture at 1/ISO |
|---|---|---|
| Bright sun | Hard, sharp-edged | f/16 |
| Hazy sun | Soft-edged | f/11 |
| Overcast | Faint or none | f/8 |
| Heavy overcast | None | f/5.6 |
| Open shade or sunset | None | f/4 |
Why people quit
- 01A camera that was never testedLight seals crumble, shutters stick, meters die. A tested body from a shop costs a little more and saves three ruined rolls.
- 02Shooting like a phoneA roll burned in an hour produces thirty-six snapshots and a bill. The hobby is the pause before the shutter.
- 03The cost creeping upTwo rolls a month with lab scans is real money. Decide a budget per month and let it set the pace.
Words you will meet
- ISO
- Film speed: how sensitive the film is to light.
- Aperture
- The lens opening, in f-numbers; smaller numbers let in more light.
- Shutter speed
- How long the film is exposed, in fractions of a second.
- SLR
- Single-lens reflex, a camera you look through the taking lens of.
- Rangefinder
- A camera focused by lining up two images in a separate window.
- 135
- The standard 35mm still film cassette.
- 120
- Wider medium-format roll film.
- Negative
- Developed film with tones reversed, scanned or printed to make a positive.
- Slide film
- Film that develops into positive transparencies.
- Light seals
- Foam strips that keep light out of a camera back; they often crumble with age.
Questions people ask
Which film should a beginner buy?
An ISO 200 or 400 color negative film; it is forgiving of exposure mistakes and every lab can develop it.
Do I need to develop film myself?
No. Labs develop and scan color and black and white film. Many people later develop black and white at home.
Is film photography expensive?
The camera can be cheap; film and lab costs per roll are the real running cost, so most people set a monthly budget.
Can airport scanners damage film?
Keep film in your carry-on and ask for a hand inspection, as the TSA recommends.
What is Sunny 16?
A rule for exposure without a meter: in bright sun, f/16 at a shutter speed near 1 over the film's ISO.
Where to go next
- 01StargazingLong exposures of star trails are a classic film project. $82 to start
- 02Collecting vintage tackleAnother collection of well-made old things that still work. $83 to start
How it compares
| Film photography | Collecting vintage tackle | Stargazing | Birdwatching | |
|---|---|---|---|---|
| Start cost | $193 | $83 | $82 | $161 |
| Each month | $25 | $20 | Free | Free |
| Space | A camera bag | A shelf | A dark backyard | Anywhere outside |
| Noise | Quiet | Quiet | Quiet | Quiet |
| First result | A week to the first scans | Your first find | One clear night | Same day |
| Mess | None | A little oil | None | None |
Where to learn more
- 01Ilford Photo, beginner's guideA film maker's step-by-step guide from shooting to darkroom printing.
- 02TSA, film at airport securityOfficial US advice on traveling with undeveloped film.
Sources: Ilford Photo, beginner's guide to film · Wikipedia, 135 film · Wikipedia, Photographic film (history) · Wikipedia, Sunny 16 rule · TSA, Film
Researched and written by the Fjords Team.