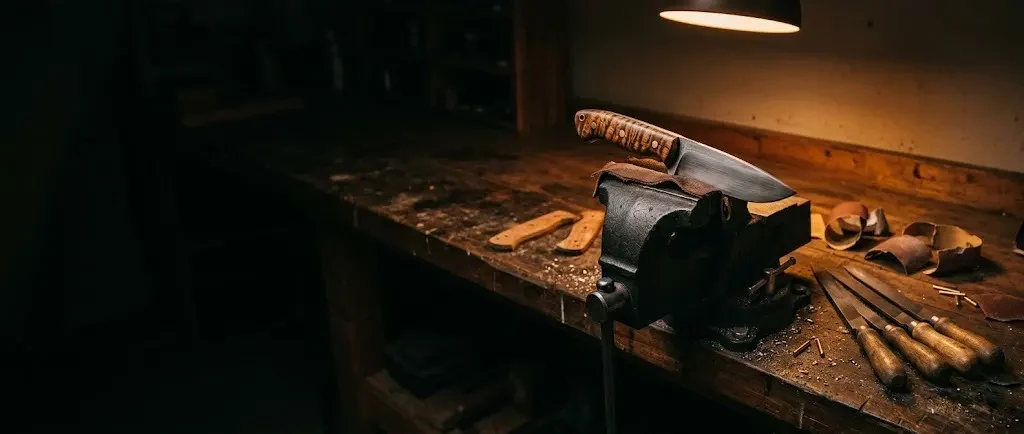
 AI illustration
Knife handle making
Buy a finished blade blank and build the handle: scales, pins, epoxy, files. A real knife in a weekend, with no forge.
What it is like
Most of what people call knife making at home is handle making. The blade arrives ground, hardened and sharp. You fit two scales to the tang, pin and glue them, and shape the grip to your own hand.
It is a compact first metal-and-wood project. The joint has to be flat, the epoxy has to cure, and everything after that is files and sandpaper.
A leather sheath is the natural next step, and it is a leathercraft project in its own right. Forging and heat-treating blades is a different hobby with fire, quench oil and grinders, and is best learned in a class.
A handle has two jobs: to hold the blade so it never moves, and to fit the hand so it is safe and comfortable for years. The first comes from the joint - scales sanded perfectly flat, a clean roughened tang, slow epoxy and pins that lock everything mechanically. The second comes from shaping: filing the scales flush with the tang, rounding the edges and checking the grip in your own hand again and again until nothing presses or slips.
Most makers find that the materials become the fun of it. Plain hardwood, stabilized burl, antler with its natural bark, colored liners and brass pins all look and feel different, and the same blade blank can become a dozen different knives. A leather sheath usually follows, which turns one weekend project into a small kit you carry and use.
- A session
- An evening to drill and glue; another to shape and finish after the overnight cure.
- A week
- A knife a weekend once the steps are familiar.
- Season
- All year, at a bench with good ventilation.
Indoors · Solo
Kinds and styles
Two scales pinned and glued either side of a flat tang - the classic first build and the project on this page.
A narrow tang glued into a drilled handle block, often with a guard and a butt cap.
Leather washers or birch bark stacked on a hidden tang and shaped; seen on hunting and military knives.
Natural materials with their own texture, grippy when wet, each piece different.
Resin-cast fiber sheets that are tough, water-proof and grippy, popular on working knives.
New scales on an old kitchen or hunting knife whose handle has cracked or loosened.
Is it for you?
You will probably love it if
- You want a tool you made and will use for years
- Slow filing and sanding relax you
- You have a drill, a vise and a couple of clamps
Maybe not, if
- You wanted to forge the blade: that is a separate craft with a forge and a quench tank
- You rush glue-ups
- Fine dust at your bench is a problem
What to buy first
- 01Full-tang knife blade blankGround, heat-treated and sharp; you only build the handleFind it on Amazon$10
- 02Handle scales, stabilized wood, 1 pairResin-filled wood does not shrink away from the tangFind it on Amazon$25
- 03Brass pin rod, 1/8 inchTwo or three pins lock the scales to the tangFind it on Amazon$5
- 04Slow-cure two-part epoxyThirty-minute epoxy gives time to align and clampFind it on Amazon$14
- 05File set, 3 hand filesShapes the handle after the glue curesFind it on Amazon$13
- 06220-grit sandpaperThe first of several grits to a smooth gripFind it on Amazon$5
- Everything you need to beginAbout $15 a month after that$72
Typical US prices for entry-level gear, rounded. Last checked October 2026. How we get the numbers
The Amazon links open a search for that type of item, not a product chosen for us, and the prices in the list are our typical figures, or the listing of the shop a line names, not Amazon's price for any listing. If you buy through one we may earn a commission at no extra cost to you; as an Amazon Associate we earn from qualifying purchases.
What to buy next
- 01Drill pressStraight pin holes through scale and tangFind it on Amazon Second or third knife
- 02RespiratorHandle dust and cured epoxy are harmful to breatheFind it on Amazon Any sanding
- 03Liner materialThin colored layers between tang and scaleFind it on Amazon Decorative builds
- 04Mosaic pins or corby boltsDecorative or extra-strong fasteningsFind it on Amazon Later builds
- 05Leather and sheath kitA sheath to carry and protect itFind it on Amazon After the first knife
- 06Micarta or G-10 scalesWaterproof, tough handle materialFind it on Amazon A working knife
No prices here on purpose: these are later buys, and what to spend depends on how far the hobby has taken you. The Amazon links work like the ones above: a search for the type of item, and a possible commission for us at no extra cost to you.
From a blade blank to a finished knife handle, step by step
Handle making starts with a finished, heat-treated blade blank, so no forge is needed. This guide goes from choosing the tang and the handle material to fitting, gluing, shaping and finishing, with the choices at each step. Tang and material facts follow Wikipedia.
Warning: Before you start The blade is sharp from the first minute: keep it taped until the handle is finished. Grinding and sanding antler, bone, stabilized wood and cured epoxy make harmful dust, so wear a respirator and work with ventilation. Wear gloves when mixing epoxy. Knife carry laws differ by state and city; check yours before the knife leaves the house.
Wrap the whole edge and both flats in several layers of tape. It is sharp for the entire build.
Sand the inside face of each scale dead flat. Clamp one scale to the tang and drill the pin holes through the tang's holes, then repeat for the other.
Roughen the tang, mix the epoxy fully, butter both scales, push the pins through, clamp with even pressure and wipe the squeeze-out.
Leave it clamped for the full cure, whatever the packet says about minutes.
File the scales down to the tang and round the grip, sand through the grits, and finish with oil or wax.
Scales on a full tang
The knife from the side, assembled, and from the spine, taken apart along the pins.
- A Taped blade Several layers of tape over the edge and both flats. Step 3 →
- B Brass pins Two or three, through the holes drilled from the tang. Step 5 →
- C Scale Stabilized wood, Micarta or antler; inner face sanded dead flat. Step 2 →
- D Epoxy Slow-cure, buttered on both scales; cured overnight. Step 5 →
- E Full tang Runs the full length of the grip. Step 1 →
Steps 1-3Choose
- Step 1 of 8 · Choose
Choose the tang
The tang is the part of the blade inside the handle (Wikipedia).
Most people: full tang with scales (a first build).
Start here Full tang with scalesBest forA first build
The tang runs the length of the grip; handle scales fasten on both sides with pins and epoxy, and it takes the most leverage.
Hidden tangBest forRound handles
A narrow tang glued into a drilled handle block so nothing shows on the surface.
- Step 2 of 8 · Choose
Choose the handle material
The material decides how the handle behaves in water and use.
Most people: stabilized wood (wood looks, stable fit).
Start here Stabilized woodBest forWood looks, stable fit
Resin forced into the wood under pressure or vacuum limits how much water it takes up and how much it moves (Wikipedia).
Micarta or G-10Best forWorking knives
Resin-cast fibre sheets: tough, waterproof, grippy.
Antler or boneBest forNatural grip
Each piece different; grippy when wet.
- Step 3 of 8 · Choose
Protect the blade and yourself
Warning: CAUTION Sanding antler, bone, stabilized wood and cured epoxy makes harmful dust: wear a respirator, work with ventilation, and wear gloves when mixing epoxy.
Wrap the whole edge and both flats in several layers of tape before anything else; the blade stays sharp through the whole build.
Steps 4-7Build
- Step 4 of 8 · Build
Flatten and drill
Flatten the inside face of both scales until each one sits on the tang with no gap. Then clamp one scale in place and use the tang's own holes as the guide for drilling the pin holes; do the same for the second scale.
Goes wrong: Gaps at the tang. Uneven scales leave a line that lets water in.
- Step 5 of 8 · Build
Glue up
Roughen the tang, mix slow-cure epoxy completely, butter both scales, push the pins through, clamp with even pressure and wipe off the squeeze-out.
Most people: slow-cure epoxy (every build).
Start here Slow-cure epoxyBest forEvery build
Thirty minutes or more to align and clamp.
Fast epoxyBest forSmall repairs
No time to align the scales.
Not for a first tryGoes wrong: Too much clamping pressure. It squeezes out the glue; firm and even, not crushing.
- Step 6 of 8 · Build
Wait for the full cure
Leave it clamped overnight, whatever the packet says about minutes.
- Step 7 of 8 · Build
Shape, sand and finish
File the scales down to the tang, round the grip, sand through the grits from 220 up, and finish with oil or wax.
Goes wrong: Scratching the blade. Files and belts mark steel; keep the tape on and the tools on the handle.
Step 8Next
- Step 8 of 8 · Next
Choose a next build
After a pair of scales, makers move on.
Most people: rehandling an old knife (rescuing a favourite).
Start here Rehandling an old knifeBest forRescuing a favourite
New scales on a kitchen or hunting knife with a cracked handle.
Stacked leather handleBest forHidden-tang knives
Leather washers stacked on the tang and shaped.
A leather sheathBest forCarrying it
Moulded and stitched to fit the finished knife.
In shortIf it goes wrong
- Gaps at the tang.
- Step 4 · Flatten and drill
- Too much clamping pressure.
- Step 5 · Glue up
- Scratching the blade.
- Step 7 · Shape, sand and finish
How you get better
- First knifeWood scales on a full-tang blank
Flat scales, two or three pins, slow epoxy, overnight cure, filing and oil.
- Knives 2 to 4Other materials
Antler, bone or Micarta scales, and colored liners between scale and tang.
- Months 2 to 6Hidden tangs and guards
Drilled handle blocks, brass guards and butt caps, or a stacked leather handle.
- Months 6 to 12A sheath
A stitched leather sheath fitted to the knife.
- After thatYour own blades
Grinding blanks from bought steel with a professional heat treat, or a forging class.
- Taping and handling a sharp blade
- Flattening scales
- Drilling pin holes
- Mixing and spreading epoxy
- Clamping evenly
- Peening or setting pins
- Filing to the tang
- Shaping a grip
- Sanding through grits
- Oil and wax finishes
- Fitting liners and spacers
- Making a leather sheath
Small things that help
- Keep the edge taped until the very end.
- Flatten the inside of each scale on sandpaper on glass.
- Rough up the tang and clean it with alcohol before gluing.
- Dry-fit everything before mixing epoxy.
- Shape the front of the scales before glue-up; it is hard to reach later.
- Let the epoxy cure fully before filing.
Beginner mistakes
- 01Gaps at the tangUneven scales leave a line that lets in water. Flatten first.
- 02Fast epoxyNo time to align and clamp. Use slow-cure.
- 03Too much clamping pressureSqueezes out all the glue. Firm, even, not crushing.
- 04Grinding the blade by accidentFiles and belts scratch blades. Tape the blade and keep tools on the handle.
- 05Breathing the dustHandle materials and epoxy dust are harmful. Use a respirator.
Handle materials
| Material | Character | Watch for |
|---|---|---|
| Stabilized wood | Stable in any humidity | Dust: wear a respirator |
| Antler | Dense, grippy when wet, each one different | The soft core; keep the textured outside |
| Bone | Hard, white, takes a polish | Must be degreased or it yellows |
| Plain hardwood | Cheap and easy to shape | Moves with humidity; seal it well |
Why people quit
- 01A gap along the tangScales that are not flat leave a line of light that becomes a crack. Flatten before anything else.
- 02Five-minute epoxyIt sets before the pins are in. Use slow-cure.
- 03Shaping too soonFiling before the full cure tears the joint. Overnight means overnight.
Words you will meet
- Tang
- The part of the blade that runs into the handle.
- Full tang
- A tang that runs the full length of the grip.
- Hidden tang
- A narrow tang concealed inside a handle.
- Scales
- The two handle pieces fixed either side of a full tang.
- Pins
- Rods through scales and tang that lock them together.
- Blank
- A finished blade sold without a handle.
- Bolster
- A metal piece at the front of the handle.
- Liner
- A thin layer between the tang and the scale.
- Stabilized wood
- Wood impregnated with resin for stability.
- Micarta
- Layers of fiber cast in resin, used for tough handles.
Questions people ask
Do I need a forge to make a knife?
No. Buy a finished, heat-treated blade blank and build the handle with hand tools, a drill and epoxy.
Which handle material is best for a first knife?
Stabilized wood or plain hardwood: easy to shape and forgiving. Micarta is tougher but dustier to work.
How many pins do I need?
Two or three on a typical full-tang knife, through the holes already in the tang.
How long does the epoxy need?
Leave it clamped overnight, whatever the packet says about working time.
Is it legal to carry the knife I make?
Carry laws depend on your state and city; check before carrying it.
Where to go next
- 01LeathercraftMake the sheath for it. $119 to start
- 02Shed huntingFound antler is a traditional handle material. Free to start
How it compares
| Knife handle making | Leathercraft | Whittling | Shed hunting | |
|---|---|---|---|---|
| Start cost | $72 | $119 | $52 | Free |
| Each month | $15 | $20 | $5 | Free |
| Space | A bench with a vise | A desk | A chair | Fields and woods |
| Noise | Low | Low | Quiet | Quiet |
| First result | 1 weekend | 1 weekend | 1 evening | A few walks |
| Mess | Dust | Scraps and dye | Shavings | Muddy boots |
Sources: Wikipedia, Knife (history and handles) · Wikipedia, Tang (blade) · Wikipedia, Wood stabilization
Researched and written by the Fjords Team.