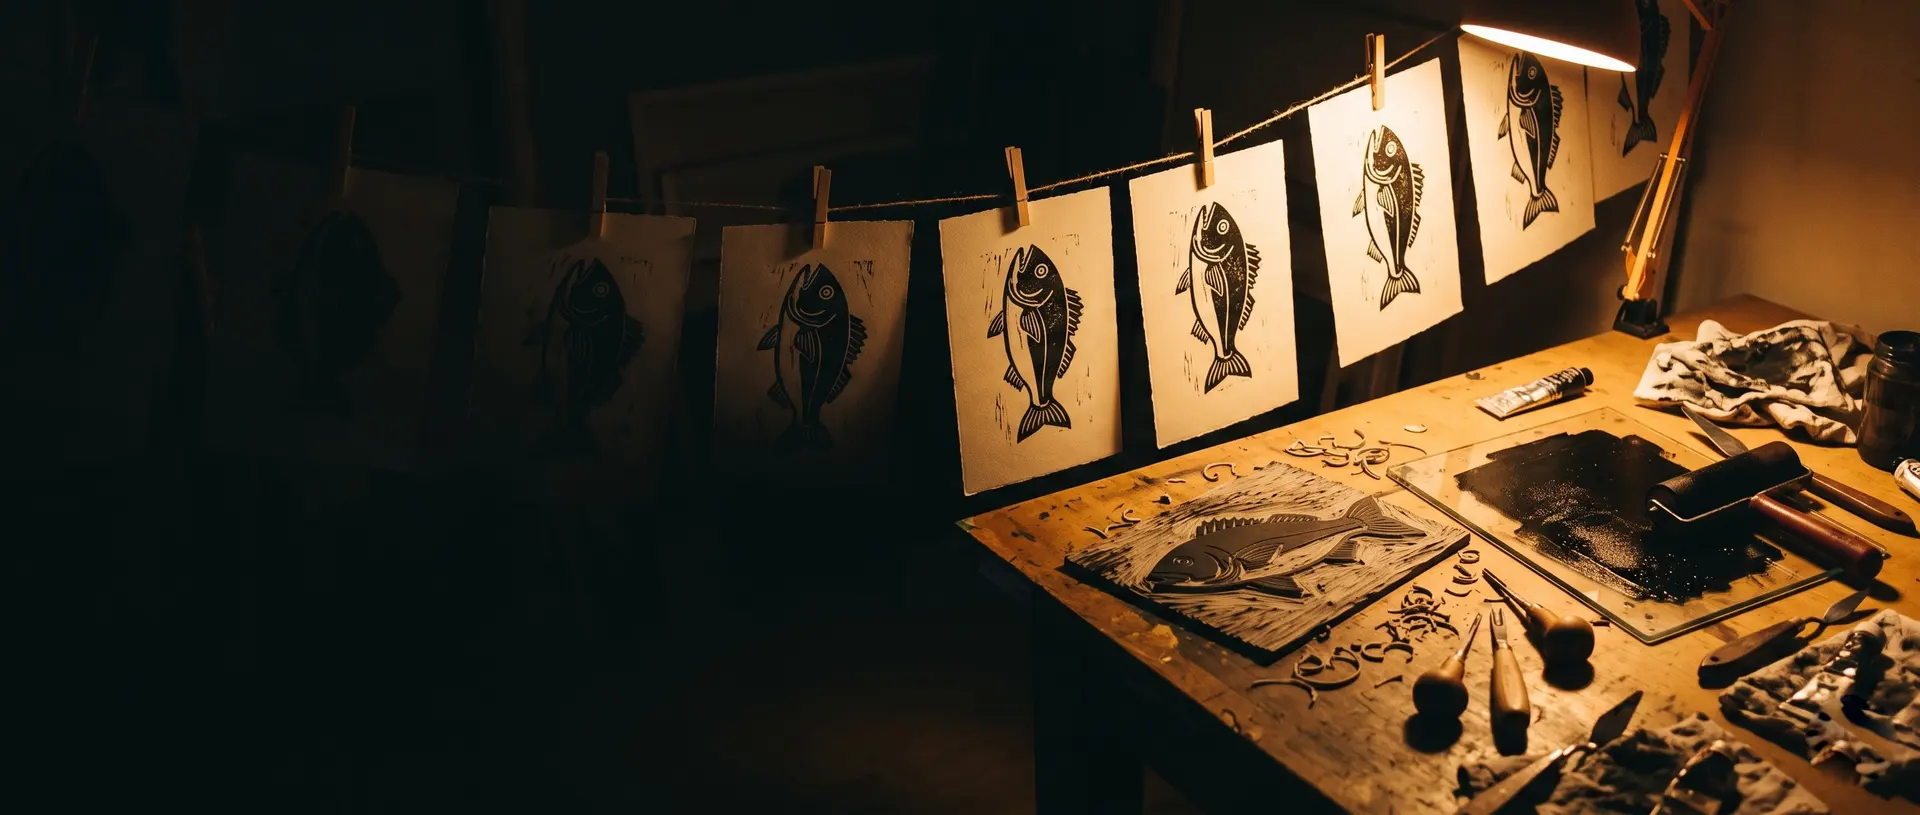
 AI illustration
Linocut printing
Carve a block, roll on ink, press a sheet. Relief printing is the fastest way from a sketch to a stack of real prints.
What it is like
Linocut is relief printing: you carve away what should stay white, ink what remains, and press a sheet of paper onto it. The block is the master and every print is an original, which is why a single evening can produce eight cards that are all originals.
The craft rewards boldness. Fine lines crumble and subtle shading is impossible, yet a strong shape in solid black has a presence that drawing on paper rarely gets. Most people’s second block is far better than their first, because the first one teaches the only two lessons that matter: carve wider than you think and ink thinner than you think.
Designing for relief is designing in two values. Every part of the block left standing prints solid color, every part carved away stays paper-white, and there is nothing in between - so shading becomes lines, dots and textures, and a good first design is a few strong shapes. Thinking that way is the real skill, and many printmakers sketch in thick black marker before they ever touch a gouge.
Color opens the next door. With several blocks, each color is printed in turn and the paper is lined up in the same place every time; with the reduction method, one block is printed, carved a little further and printed again in the next color, so the edition has to be finished before the block is gone. Either way, a stack of drying prints on a line is one of the most satisfying sights in any craft.
- A session
- An evening to carve a small block and print a few proofs.
- A week
- One block a week, or a few evenings for a color print.
- Season
- All year; holiday cards are the classic deadline.
Indoors · Solo, For two
Kinds and styles
One block, one ink, bold shapes - the way almost everyone starts, and still the classic look.
A separate block for each color, printed in register one over another.
One block carved further after each color is printed, the method Picasso used; the block is used up by the end.
Tote bags, napkins and tea towels printed with fabric ink.
Small rubber or soft-cut stamps for cards, wrapping paper and journals.
The older sibling: carving along the grain of a wood block, with a grainier look.
Is it for you?
You will probably love it if
- You like bold, graphic images more than fine detail
- You want to give the same thing to twenty people
- You enjoy the reveal of peeling the paper off the block
Maybe not, if
- You want to reproduce photos or shading; linocut is about shapes
- You cannot spare a corner where ink will not matter
- Small cutting tools worry you around children
What to buy first
- 01Lino cutter handle with five bladesOne handle, a V and a few U gouges cover everything for a yearFind it on Amazon$13
- 02Soft-cut printing blocks, a pack of small onesEasier to carve than traditional gray lino and kinder to beginners' wristsFind it on Amazon$10
- 03Water-based block printing ink, one tubeWashes off with water; black first, colors laterFind it on Amazon$9
- 04Rubber brayer, about four inchesRolls an even film of ink onto the blockFind it on Amazon$14
- 05Printmaking paper padSmooth, slightly absorbent sheets print cleaner than printer paperFind it on Amazon$10
- Everything you need to beginAbout $8 a month after that$56
Typical US prices for entry-level gear, rounded. Last checked October 2026. How we get the numbers
The Amazon links open a search for that type of item, not a product chosen for us, and the prices in the list are our typical figures, or the listing of the shop a line names, not Amazon's price for any listing. If you buy through one we may earn a commission at no extra cost to you; as an Amazon Associate we earn from qualifying purchases.
What to buy next
- 01Bench hookHolds the block so both hands stay behind the bladeFind it on Amazon From the first block
- 02BarenEven hand pressure without a pressFind it on Amazon Larger prints
- 03Traditional lino blocksCrisper detail and linesFind it on Amazon After a few soft blocks
- 04Ink set in several colorsWater-based colors for multi-block and reduction printsFind it on Amazon Color prints
- 05Fabric block printing inkWashfast prints on totes and tea towelsFind it on Amazon Printing on cloth
- 06Small tabletop pressEven, repeatable pressureFind it on Amazon Regular editions
No prices here on purpose: these are later buys, and what to spend depends on how far the hobby has taken you. The Amazon links work like the ones above: a search for the type of item, and a possible commission for us at no extra cost to you.
Linocut starter kits compared
Six kits and tool sets from two makers, Speedball in the US and Essdee in the UK, with what each box contains by the maker's own list. The first two are the smallest complete kits for a first print on paper.
| Model | Type | Specs | Who it suits | Links |
|---|---|---|---|---|
| Speedball Water-Soluble Block Printing Starter Kit | Starter kit, paper | A 4 in soft rubber brayer, 1.25 fl oz of black water-soluble ink, a lino handle with #1, #2 and #5 cutters and a 4 x 6 in Speedy-Carve block; Speedball calls it the kit for the beginner or student | A first print on paper | Find it on AmazonMaker's page |
| Essdee Linocut Taster Kit | Starter kit, paper | Two SoftCut blocks of 150 x 105 mm (about 6 x 4 in), a 45 mm ink roller, a lino handle with No. 1 and No. 2 cutters, 100 ml of black block printing ink and instructions; Essdee pitches it as enough for two linocuts | Trying linocut before buying tools | Find it on AmazonMaker's page |
| Essdee Lino Cutting & Printing Kit | Complete kit, 23 pieces | Two SoftCut blocks and two lino blocks of 178 x 127 mm (7 x 5 in) to compare, a practice piece, a 100 mm roller, an ink tray, a handle with cutters No. 1 to 5 plus a safety cutter, a safety hand guard, a baren, two stamps and 100 ml of black ink | Comparing soft-cut and traditional lino | Find it on AmazonMaker's page |
| Speedball Deluxe Water-Soluble Block Printing Kit | Complete kit, colour | Speedball's step up from the starter kit: more ink colours, a bench hook that doubles as an inking plate, and two kinds of carving block | Moving on to colour prints | Find it on AmazonMaker's page |
| Speedball Fabric Block Printing Starter Kit | Starter kit, fabric | 1.25 fl oz of black fabric block printing ink, a 4 in hard rubber brayer, a 4 x 6 in Speedy-Carve block and a lino handle with #1, #2 and #5 cutters; Speedball says its fabric inks need no heat setting | Tote bags and tea towels | Find it on AmazonMaker's page |
| Essdee Lino Cutter and Safety Hand Guard Set | Tools only | A lino handle with cutters No. 1 to 5 and a safety hand guard whose upright walls catch a slipping blade; usable left- or right-handed. Add a block, a brayer and ink | Carving with a guard for the holding hand | Find it on AmazonMaker's page |
How we put this together. All contents come from the makers' own product pages (Speedball Art and Essdee), read on 26 October 2026; no prices, because they change. We have not tried these kits side by side. Inch sizes for the Essdee kits are converted from the maker's millimetres. Checked on 26 October 2026. There are no prices in this table: the Amazon link searches for the exact model, and we may earn a commission if you buy through it.
From a sketch to a numbered edition of prints, step by step
Linocut is relief printing: the raised, uncarved surface takes the ink and prints, the carved-away recesses stay paper-coloured, and the design comes out as a mirror image (Wikipedia). This guide goes from block and tools to carving, proofing and printing an edition, then to colour, with the choices at each step.
Warning: Before you start The gouges are small but very sharp. Clamp the block or use a bench hook, cut away from your body and your other hand, and keep the blades capped when they are down. Children print with an adult doing the carving. Water-based ink washes off; keep it off clothes anyway.
Sketch a bold shape - a leaf, a fish, a house. Trace it onto the block in reverse: whatever reads left on the block prints right.
Everything you cut away stays paper-colored. Hold the block with a bench hook or a clamp, cut away from the holding hand, and start with the big areas.
Roll a thin, even film of ink until the brayer sounds tacky. Lay the paper on, rub with the back of a spoon in circles, peel from one corner.
Clean up ragged edges on the block, carve out any stray marks, print again. The second proof is usually the keeper.
Ink, print, hang to dry, repeat. Number the cards in pencil: 1/8, 2/8 and so on, the way printmakers do.
How a relief print works
A carved block in section with the paper on it, and the print it leaves below.
- A Back of a spoon Rubbed in small circles over the back of the paper. Step 6 →
- B Paper Laid once and held still while rubbing. Step 6 →
- C Ink on the raised surface A thin, even film rolled on with a brayer. Step 5 →
- D Carved recesses Cut with V and U gouges; they stay paper-coloured. Step 4 →
- E Lino block Linoleum has no grain; warm it to cut more easily. Step 1 →
- F The print Dark where the block was raised, a mirror image of it. Step 7 →
Steps 1-3Prepare
- Step 1 of 8 · Prepare
Choose the block
Linoleum has no grain and does not split, and it is easier to cut than wood - especially when warmed - but it wears faster under pressure (Wikipedia), which is why schools use it to introduce printmaking.
Most people: soft-cut block (first prints).
Start here Soft-cut blockBest forFirst prints
Easier to carve and kinder to beginners' wrists; fine lines crumble.
Traditional grey linoBest forCrisp detail
Firmer; warm it on a radiator or with a hairdryer to cut more easily.
Wood blockBest forWoodcut, later
Carved along the grain, with a grainier look.
- Step 2 of 8 · Prepare
Draw the design in reverse
Sketch a bold shape and transfer it to the block flipped: whatever reads left on the block prints right.
Goes wrong: Letters the wrong way round. Text prints backwards unless it is carved reversed.
- Step 3 of 8 · Prepare
Set up to carve safely
Warning: CAUTION The gouges are small but very sharp: cut away from your body and away from the hand holding the block. Children print, an adult carves.
Hold the block with a bench hook or a clamp, and keep the gouges capped when they are down.
Steps 4-6Carve and proof
- Step 4 of 8 · Carve and proof
Carve away the white
Everything you cut away stays paper-coloured. Wikipedia lists knives, V-shaped chisels and U-shaped gouges as the carving tools.
Most people: v gouge (outlines and fine lines).
Start here V gougeBest forOutlines and fine lines
Start by outlining the shapes.
Wide U gougeBest forClearing large areas
Removes the background quickly.
Goes wrong: Shallow cuts. Barely carved areas pick up ink; carve deeper in large white areas.
- Step 5 of 8 · Carve and proof
Ink the block
Roll a thin, even film of ink with a brayer until it sounds and looks tacky, then roll it onto the block.
Most people: water-based block ink (home printing).
Start here Water-based block inkBest forHome printing
Washes off with water.
Fabric inkBest forTote bags and napkins
For printing on cloth.
Goes wrong: Too much ink. Fine lines fill and edges blob; roll thin and even.
- Step 6 of 8 · Carve and proof
Pull a proof
Lay the paper on the inked block and rub the back by hand - Wikipedia notes relief prints need no press - with the back of a spoon in small circles, then peel from one corner. Clean up ragged edges and stray marks on the block and print again; the second proof is usually the keeper.
Goes wrong: Paper that shifts. It doubles the image; lay it once and hold it still while rubbing.
Steps 7-8Print and next
- Step 7 of 8 · Print and next
Print the edition
Ink, print, hang to dry, repeat. Number each print in pencil - 1/8, 2/8 and so on - the way printmakers mark an edition.
- Step 8 of 8 · Print and next
Choose a colour method
Wikipedia describes the two ways of printing linocuts in several colours.
Most people: reduction print (one block, several colours).
One block per colourBest forChangeable designs
Each colour on its own block, printed one over another in register, as the Grosvenor School artists did.
Start here Reduction printBest forOne block, several colours
Picasso's method: after each colour is printed, carve away more of the same block; it is used up by the end.
In shortIf it goes wrong
- Letters the wrong way round.
- Step 2 · Draw the design in reverse
- Shallow cuts.
- Step 4 · Carve away the white
- Too much ink.
- Step 5 · Ink the block
- Paper that shifts.
- Step 6 · Pull a proof
How you get better
- First eveningA small one-color card
Bold shapes, a soft-cut block, black ink and spoon burnishing.
- First monthTexture and line
Hatching, patterns and thinner lines, and an edition of ten.
- Months 2 to 4Two colors
Two blocks in register, or a simple two-color reduction.
- Months 4 to 12Lino and larger blocks
Traditional gray lino, larger prints, fabric printing and a baren or small press.
- After thatEditions and your own style
Multi-color reductions, signed editions, markets and print fairs.
- Designing in black and white
- Transferring a reversed image
- Holding the block safely
- V and U gouge cuts
- Clearing large areas
- Rolling ink thinly
- Burnishing by hand
- Proofing and correcting
- Registration for color
- Reduction printing
- Printing on fabric
- Editioning and signing
Small things that help
- Draw in solid black and white first; shading must become lines or textures.
- Remember the print is a mirror image, especially for letters.
- Carve away from the holding hand, with a bench hook.
- Roll ink until it looks like velvet, not shiny.
- Pull a proof early and often.
- Warm traditional lino slightly to make it cut more easily.
Beginner mistakes
- 01Letters the wrong way roundText prints backwards unless carved reversed. Trace your design flipped.
- 02Too much inkFine lines fill and edges blob. Roll thin and even.
- 03Shallow cutsBarely carved areas pick up ink. Carve deeper in large white areas.
- 04Fine detail on soft blocksThin lines crumble. Keep it bold.
- 05Paper that shiftsDouble images. Lay the paper once and hold it still while rubbing.
Blocks and papers
| Material | Carves | Prints | Best for |
|---|---|---|---|
| Soft-cut (rubber-like) block | Easily, like firm cheese | Clean, slightly soft edges | A first year |
| Traditional gray lino | Firmly; warm it first | Crisp lines and fine detail | Once your wrists are trained |
| Vinyl block | Easily, both sides usable | Clean, no crumbling | Cards and small editions |
| Printmaking paper, 90 to 120 gsm | - | Even, little bleed | Cards and small prints |
| Printer paper, 80 gsm | - | Patchy with hand pressure | Proofs only |
Why people quit
- 01Too much inkA blobby print nearly always means a thick layer. Roll thinner until the brayer sounds like tearing tape.
- 02Too much detailThin lines crumble and fill with ink. A first block wants three or four bold shapes, not a sketchbook drawing.
- 03Cutting toward the handOne slip and the evening is over. A bench hook or a clamp holds the block so that both hands stay behind the blade.
Words you will meet
- Relief printing
- Printing from the raised surface of a block.
- Brayer
- A roller for spreading ink on the block.
- Gouge
- A U or V shaped cutting tool.
- Bench hook
- A board with lips that holds the block against the table.
- Proof
- A test print to check the block.
- Edition
- A set of matching prints, numbered in pencil.
- Registration
- Lining up paper and blocks for multi-color prints.
- Reduction print
- A color print made by carving one block further between colors.
- Baren
- A flat hand tool for rubbing the back of the paper.
- Soft-cut
- A rubbery block material that carves easily.
Questions people ask
What is a linocut print?
Tate describes it as a relief print made the way a woodcut is, but cut into linoleum: a thin layer of solidified linseed oil on a canvas backing, usually mounted on wood. Lino has no grain, so it cuts in any direction, and its slightly textured surface takes ink evenly. Linoleum was invented in the 19th century as a floor covering and became popular with artists and amateurs for printmaking in the 20th.
Who are famous linocut artists?
Wikipedia names the Expressionists, the Grosvenor School, Pablo Picasso and Henri Matisse as the artists who made linocut a professional medium. The Grosvenor School of Modern Art opened in London in 1925, and Claude Flight taught linocutting there; his students included Sybil Andrews, Cyril Power and Lill Tschudi, and the Australians Ethel Spowers and Dorrit Black. Spowers' Wet Afternoon (1930) was printed from four colour blocks, while Picasso cut a single block further after each colour. Wikipedia's list of linocut artists also includes M. C. Escher, Karl Schmidt-Rottluff, Elizabeth Catlett and Walter Inglis Anderson, who made the first large-scale colour linocuts by an American artist around 1943-45.
Do I need a printing press?
No. A wooden spoon or a baren gives good prints by hand.
Soft-cut or traditional lino?
Soft-cut is easier to carve for beginners; traditional lino holds finer detail once your hands are practiced.
Why is my print patchy?
Usually too little pressure, too little ink or a too-smooth, hard paper. Roll an even film and burnish firmly.
Can I print on fabric?
Yes, with fabric block printing ink, following that ink's own instructions; Speedball, for one, says its fabric block printing inks need no heat setting.
What does 3/10 on a print mean?
It is the third print of an edition of ten.
Where to go next
- 01GyotakuAnother way of printing by hand - from a fish instead of a carved block. $40 to start
- 02PapermakingHandmade paper to print on. $44 to start
How it compares
| Linocut printing | Gyotaku | Papermaking | Pyrography | |
|---|---|---|---|---|
| Start cost | $56 | $40 | $44 | $54 |
| Each month | $8 | $8 | $3 | $5 |
| Space | An inky desk | A table | A kitchen counter | A desk by a window |
| Noise | Quiet | Quiet | Low | Quiet |
| First result | 1 evening | 1 afternoon | 1 weekend | 1 evening |
| Mess | Ink | Ink | Water and pulp | Smoke and ash |
Where to learn more
- 01Speedball ArtA block printing supplier with technique guides for beginners.
Sources: Speedball Art, block printing basics · Wikipedia, Linocut · Tate, Linocut (art term) · Wikipedia, Grosvenor School of Modern Art · Speedball Art, block printing kits · Essdee, lino cutting kits · Wikipedia, Relief printing · Wikipedia, Linoleum
Researched and written by the Fjords Team.