 AI illustration
Pyrography
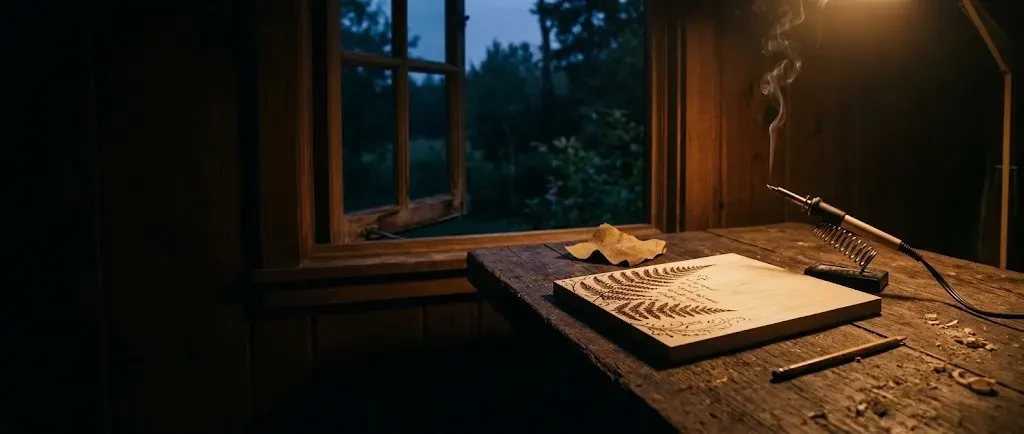
A hot pen and a pale board. Wood burning is slow, quiet drawing that leaves a mark you cannot erase.
What it is like
Pyrography is drawing with a heated pen. The tool is a soldering iron with changeable tips; the paper is a board of pale wood. Every stroke is a decision, because the mark cannot be erased, and that is what makes the craft calm rather than nervous: you slow down, you test on the back, you commit.
The learning curve is about control of speed and heat. The first evening produces a wobbly coaster with a couple of scorch marks where the pen paused. By the fourth or fifth piece the lines are even, the shading is smooth, and lettering starts to look deliberate. People who already draw get there faster, but a steady hand is more useful than a drawing background.
Tone in pyrography comes from time, not pressure. A hot tip pulled quickly leaves a pale line; the same tip moved slowly burns deeper and darker. Shading is built up the same way, with light passes laid over one another until an area reaches the tone you want. Wood grain plays its part too: the lighter, softer earlywood in each growth ring burns faster than the darker latewood, which is why pale, fine-grained woods like basswood and birch give the smoothest results.
Most people start with lines and lettering, then move to shading, texture and pictures. Because every mark is permanent, the craft rewards planning - a traced design, a test stroke on the back, a pause before committing - and that slow, careful rhythm is a large part of why people find it so calming.
- A session
- An evening for a coaster or small plaque; larger shaded pieces over many sessions.
- A week
- A few evenings at the desk.
- Season
- All year, by an open window.
Indoors · Solo
Kinds and styles
Outlines, signs and names on plaques and boxes - where everyone starts.
Animals, portraits and landscapes built up from layers of tone with shading tips.
Spoons, cutting boards and rolling pins decorated and finished with food-safe oil.
Designs burned into the shell of dried hard-shell gourds, a favorite pairing of crafts.
Lower heat on vegetable-tanned leather or heavy card for a different look.
Burned designs tinted afterwards with watercolor pencils or thin paints.
Is it for you?
You will probably love it if
- You already like to draw and want the result on something solid
- You have a desk by a window you can open
- You enjoy work that cannot be hurried and cannot be undone
Maybe not, if
- You want to fix mistakes - a burned line stays burned
- Smoke of any kind bothers your lungs or your household
- You want big pieces fast; a small plaque takes an evening
What to buy first
- 01Solid-point wood burning pen with a few tipsA plug-in pen with a universal and a shading tip is enough for a yearFind it on Amazon$25
- 02Basswood blanks, a pack of plaques or coastersPale, soft and even; the lines show and the pen glidesFind it on Amazon$17
- 03220-grit sandpaperA smooth, clean surface burns evenlyFind it on Amazon$5
- 04Graphite transfer paperTrace the design on, then burn over the linesFind it on Amazon$7
- Everything you need to beginAbout $5 a month after that$54
Typical US prices for entry-level gear, rounded. Last checked October 2026. How we get the numbers
The Amazon links open a search for that type of item, not a product chosen for us, and the prices in the list are our typical figures, or the listing of the shop a line names, not Amazon's price for any listing. If you buy through one we may earn a commission at no extra cost to you; as an Amazon Associate we earn from qualifying purchases.
What to buy next
- 01Wire-nib burner with temperature controlFiner lines and precise heat for detailed shadingFind it on Amazon After a few months
- 02Shading and writing tipsFlat and ball tips for tone and letteringFind it on Amazon Shading work
- 03Small desk fan or fume extractorPulls smoke away from your faceFind it on Amazon Longer sessions
- 04Basswood rounds and boxesPale, even surfaces for giftsFind it on Amazon Projects
- 05Watercolor pencilsTint burned designs softlyFind it on Amazon Adding color
- 06Tip cleaning blockKeeps tips free of carbonFind it on Amazon Regular burning
No prices here on purpose: these are later buys, and what to spend depends on how far the hobby has taken you. The Amazon links work like the ones above: a search for the type of item, and a possible commission for us at no extra cost to you.
From a blank to four burned coasters, step by step
Pyrography - pokerwork, or wood burning - is decorating wood with burn marks from a controlled heated tip (Wikipedia). This guide goes from choosing the pen and the wood to tracing, burning lines and shading, then to other surfaces, with the choices at each step.
Warning: Before you start The tip reaches several hundred degrees and stays hot for minutes after the pen is unplugged. Rest the pen in its stand, keep the cord away from the tip, and never leave it plugged in unattended. Burn only untreated solid wood, with a window open and a small fan pulling the smoke away from your face. Keep children and pets out of reach of the pen.
Sand the blank with the grain until it feels like paper. Wipe the dust off with a dry cloth.
Lay transfer paper under a printed design and go over it with a pencil. Simple shapes and single words are the right first motifs.
Let the pen heat fully, then make a few strokes on the back of the blank. Speed, not pressure, sets how dark a line is.
Pull the pen toward you in short, even strokes. Lift and restart rather than pushing through a hard patch of grain.
Switch to the shading tip for the flat areas. Erase any pencil, then wipe on a thin coat of food-safe oil or wax.
One coaster
The coaster from the front, and its back with the test strokes made first.
- A Outline Short strokes Lift at the end. Step 6 →
- B Sanded blank With the grain Pale basswood; dust wiped off. Step 4 →
- C Shading Flat areas Clean tip often. Step 7 →
- D Test strokes On the back Fast is pale, slow is dark. Step 5 →
Steps 1-3Tools and wood
- Step 1 of 8 · Tools and wood
Choose a burner
Warning: WARNING Never try "fractal burning" with high-voltage current: Wikipedia records dozens of deaths from it.
Wikipedia describes two kinds of hand burner.
Most people: solid-point pen (a first year).
Start here Solid-point penBest forA first year
Like a soldering iron: a solid brass tip at a fixed temperature, with a universal and a shading tip.
Wire-nib burnerBest forFine detail and tone
Variable temperature, with the current running through the nib; many interchangeable nibs.
- Step 2 of 8 · Tools and wood
Choose the wood
Light-coloured hardwoods with an unobtrusive fine grain are most used - sycamore, basswood, beech and birch; softwoods burn faster and need less heat (Wikipedia).
Most people: basswood blanks (first pieces).
Start here Basswood blanksBest forFirst pieces
Pale, soft and even; the pen glides.
Birch or beechBest forKitchen pieces
Harder, takes fine lines.
Plywood or MDFBest forNever
Glues and treatments release harmful fumes when burned.
Not for a first tryGoes wrong: Treated wood. Wikipedia warns that pressure-treated, stained, painted or sealed wood can release dangerous substances.
- Step 3 of 8 · Tools and wood
Set up and ventilate
Warning: CAUTION The tip stays hot for minutes after unplugging: rest it in its stand, keep the cord away from the tip, never leave it plugged in unattended, and keep children and pets away.
Open a window and run a small fan pulling smoke away from your face; Wikipedia stresses ventilation and a mask when sanding, because wood dust is hazardous.
Steps 4-7Burning
- Step 4 of 8 · Burning
Sand and trace
Sand with the grain until it feels like paper and wipe the dust off. Lay graphite transfer paper under a printed design and go over the lines with a pencil; simple shapes and single words make the best first motifs.
- Step 5 of 8 · Burning
Test on the back
Let the pen heat fully and make a few strokes on the back of the blank. Tone changes with the tip, the temperature and the way the tip is applied (Wikipedia) - with a fixed-heat pen, mostly how fast you move.
Goes wrong: Pressing too hard. It gouges the wood and breaks tips; let heat and time do the work.
- Step 6 of 8 · Burning
Burn the outline
Pull the pen towards you in short, even strokes. Lift and restart rather than pushing through a hard patch of grain.
Goes wrong: Pausing mid-line. The tip leaves a dark blob; keep moving and lift at the end.
- Step 7 of 8 · Burning
Shade and finish
Switch to the shading tip for flat areas, cleaning carbon off the tip often. Erase the pencil, then wipe on a thin coat of food-safe oil or wax.
Step 8Next
- Step 8 of 8 · Next
Choose another surface
Wikipedia names other materials pyrographers work on.
Most people: gourds (bowls and lamps).
Start here GourdsBest forBowls and lamps
Designs burned into the shell of dried hard-shell gourds.
Vegetable-tanned leatherBest forLeather goods
Only this kind: modern tanning chemicals are toxic when burned.
Shaded picturesBest forFine art
Animals and landscapes built from layers of tone.
In shortIf it goes wrong
- Treated wood.
- Step 2 · Choose the wood
- Pressing too hard.
- Step 5 · Test on the back
- Pausing mid-line.
- Step 6 · Burn the outline
How you get better
- First eveningFour coasters
Simple outlines and a word or two on sanded basswood.
- First monthLettering and borders
Even strokes, curves and lettering on plaques and boxes.
- Months 2 to 4Shading
Tonal shading with flat tips, from light to dark in layers.
- Months 4 to 12Pictures and texture
Animals and landscapes with fur, feather and bark textures; a wire-nib burner if you want finer control.
- After thatOther surfaces
Spoons, gourds, leather and colored work, and pieces for gifts or markets.
- Preparing the wood
- Transferring designs
- Controlling speed for tone
- Even outlines
- Following and crossing grain
- Lettering
- Shading with flat tips
- Layering tones
- Texture: fur, feathers, wood
- Cleaning tips
- Finishing with oil or wax
- Burning on other materials
Small things that help
- Sand smooth and wipe off all dust before burning.
- Test every tip on the back or a scrap first.
- Go slower for darker lines; never press harder.
- Pull the pen toward you in short strokes.
- Build shading in light layers.
- Clean carbon from the tip often.
Beginner mistakes
- 01Pressing too hardGouges and broken tips. Let heat and time do the work.
- 02Pausing mid-lineLeaves a dark blob. Keep moving and lift at the end.
- 03Burning plywood or MDFGlues and treatments give off harmful fumes. Solid untreated wood only.
- 04Dirty tipsCarbon makes lines uneven. Clean the tip often.
- 05No ventilationSmoke builds up. Open a window and use a fan.
Which wood to burn
Only untreated, unglued solid wood goes under the pen. Lighter, softer woods take a line more evenly.
| Wood | Burns | Looks | Good for |
|---|---|---|---|
| Basswood | Evenly, little grain | Pale cream | A first board and detailed work |
| Birch | Evenly, fine grain | Pale with soft figure | Plaques and spoons |
| Poplar | Evenly, some green streaks | Light with color variation | Practice boards |
| Maple | Slowly, needs a hotter tip | Bright and smooth | Fine lettering |
| Pine | Unevenly, the soft bands flare | Yellow with bold grain | Rustic signs only |
| Plywood, MDF, treated wood | Do not burn | - | Glues and treatments give off harmful fumes |
Why people quit
- 01Pressing too hardA faint line is fixed by going slower, not by leaning on the pen. Pressure gouges the wood and snaps tips.
- 02The wrong boardRough, resinous or glued wood burns in blotches. Basswood sanded smooth is the whole secret of a clean first piece.
- 03No ventilationThe smoke is unpleasant and, over hours, bad for you. A window and a small fan beside the work solve it.
Words you will meet
- Pyrography
- Decorating with burn marks; 'writing with fire'.
- Pokerwork
- The older name for pyrography.
- Solid-point burner
- A pen with a heated brass tip at a fixed temperature.
- Wire-nib burner
- A burner whose wire tip is heated directly, with variable temperature.
- Tip
- The changeable point of a burner.
- Shading tip
- A flat tip for tone over larger areas.
- Transfer paper
- Graphite paper for tracing a design onto wood.
- Earlywood and latewood
- The lighter and darker bands of a growth ring, which burn differently.
- Blank
- A plain wooden piece ready for burning.
Questions people ask
Which wood is best for pyrography?
Light-colored, fine-grained hardwoods like basswood, birch, beech and sycamore are the most common choices.
Solid-point or wire-nib burner?
A solid-point pen is cheap and fine for starting; wire-nib burners give finer control and adjustable heat.
How do I get darker lines?
Move slower or use more heat, never more pressure.
Is wood burning smoke harmful?
Any smoke is unpleasant over time. Ventilate, and never burn treated wood, plywood or MDF.
Can I burn on things other than wood?
Yes - gourds, vegetable-tanned leather and heavy paper all work at the right heat.
Where to go next
- 01Gourd craftingBurning designs into dried gourds is a classic pairing. $48 to start
- 02WhittlingCarve a spoon, then burn a pattern into its handle. $52 to start
How it compares
| Pyrography | Whittling | Linocut printing | Leathercraft | |
|---|---|---|---|---|
| Start cost | $54 | $52 | $56 | $119 |
| Each month | $5 | $5 | $8 | $20 |
| Space | A desk by a window | A chair | An inky desk | A desk |
| Noise | Quiet | Quiet | Quiet | Low |
| First result | 1 evening | 1 evening | 1 evening | 1 weekend |
| Mess | Smoke and ash | Shavings | Ink | Scraps and dye |
Where to learn more
- 01RazertipA pyrography tool maker with safety and technique information.
Sources: Razertip, safety information for wood burning · Wikipedia, Pyrography (history, equipment, woods)
Researched and written by the Fjords Team.