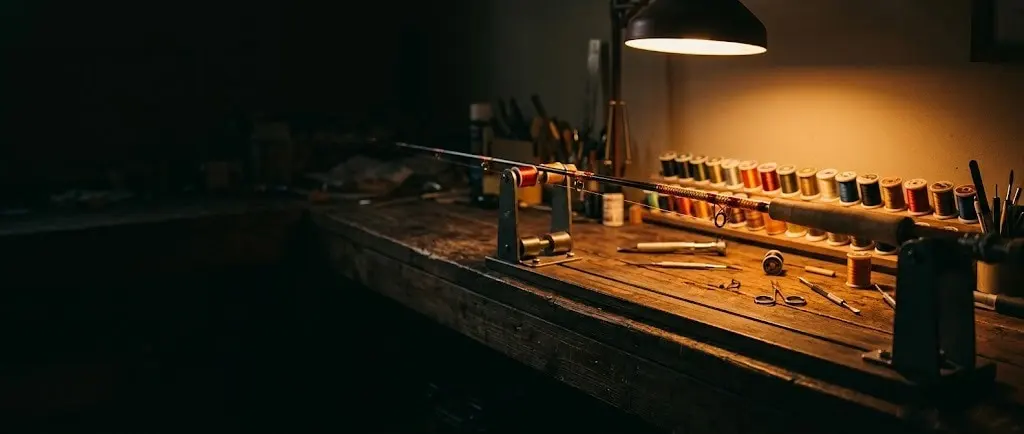
 AI illustration
Rod building
Assemble a fishing rod from a blank, a grip and a set of guides, and wrap each guide on with thread. Careful, quiet work and a tool you will use.
What it is like
A fishing rod is a tapered blank with a handle at one end and a row of guides tied on with thread. Building one from a kit is assembly, not manufacture: you align, glue, wrap and coat.
The wrapping is the craft. Each guide foot is bound with thread wound turn against turn, and the same plain wrap, mastered, becomes trim bands, diamonds and woven-in names.
The result is a rod with the grip length, guide layout and colors you chose.
Guides do more than hold the line. They spread the bending load along the blank and keep the line from slapping and tangling, which is why kit makers supply a spacing chart and why builders test the layout by tying line through the guides and bending the rod before anything is glued. Placed well, they let the blank bend in a smooth curve; placed badly, the line cuts corners and the rod feels wrong.
The thread work is where builders put their signature. A plain wrap, wound edge to edge with even tension and locked under a thin coat of finish, is both strong and quietly handsome; trim bands, diamonds and woven-in names are the same skill taken further. Because the parts can be chosen one by one - blank, grip, reel seat, guides and colors - every rod ends up a little different, made for the water its builder fishes.
- A session
- An evening for gluing the handle; several evenings for wrapping and finishing.
- A week
- A rod over two weekends, with overnight cures between steps.
- Season
- Winter is the classic building season, ready for spring.
Indoors · Solo, A club
Kinds and styles
Larger guides near the reel to tame line coming off a spinning reel - the usual first kit.
Smaller guides on top of the blank for baitcasting reels, often with a trigger grip.
Many small snake or single-foot guides and a cork grip with a fly reel seat.
Short, light rods - quick builds that make good practice for wrapping.
Heavier and slower than graphite, tough and forgiving; popular for small streams and rugged use.
Rewrapping and refinishing old split-cane rods, or eventually building your own.
Is it for you?
You will probably love it if
- You fish and want a rod set up exactly your way
- Winding thread neatly sounds restful
- You can leave a project undisturbed overnight
Maybe not, if
- You dislike epoxy and its waiting times
- Your hands shake at fine work
- You have no table as long as the rod sections
What to buy first
- 01Rod building kit: blank, grip, reel seat, guidesMatched parts with a guide spacing chart remove the guessworkFind it on Amazon$100
- 02Rod wrapping thread, size A, 2 spoolsOne main color and one for trim bandsFind it on Amazon$7
- 03Two-part rod finish, small kitThe clear coat that locks the threadFind it on Amazon$20
- 04Brushes, mixing cups and masking tapeFor epoxy and for holding guides in placeFind it on Amazon$14
- 05A wrapping stand cut from a cardboard boxTwo V-notches hold the blank; a heavy book tensions the threadFree
- Everything you need to beginAbout $10 a month after that$141
Typical US prices for entry-level gear, rounded. Last checked October 2026. How we get the numbers
The Amazon links open a search for that type of item, not a product chosen for us, and the prices in the list are our typical figures, or the listing of the shop a line names, not Amazon's price for any listing. If you buy through one we may earn a commission at no extra cost to you; as an Amazon Associate we earn from qualifying purchases.
What to buy next
- 01Rod wrapping jigSteady thread tension and an easier wrapping positionFind it on Amazon Second rod
- 02Slow rod-turning motorTurns the rod while finish cures so it does not sagFind it on Amazon Finishing
- 03Thread in several colorsColor-preserved or NCP thread for bands and patternsFind it on Amazon Trim and decorative wraps
- 04Cork rings and reamersBuild and shape your own handlesFind it on Amazon Custom grips
- 05Guide set and tip topsChoose guides to suit the blank and reelFind it on Amazon Building from parts
No prices here on purpose: these are later buys, and what to spend depends on how far the hobby has taken you. The Amazon links work like the ones above: a search for the type of item, and a possible commission for us at no extra cost to you.
From a kit of parts to a finished spinning rod, step by step
A rod is a blank, a grip and reel seat, and a row of guides wrapped on with thread and sealed with two-part finish. This guide goes from choosing the kit to finding the spine, gluing the handle, placing and wrapping guides and applying the finish, with the choices at each step. Rod facts follow Wikipedia; finishing details are Mud Hole Custom Tackle's.
Warning: Before you start Wear gloves and work with ventilation when mixing epoxy and rod finish, and keep both off your skin: repeated contact can cause a lasting allergy. Measure the two parts exactly, or the finish stays tacky.
Roll the blank under light pressure until it settles into its natural bend, and mark that side.
Ream the grip to fit, then epoxy the reel seat and grip in place along the spine mark. Let it cure.
Follow the kit's spacing chart and tape one foot of each guide down. Sight along the rod to line them up.
Start the thread over its own tail, wind each turn snug against the last, and pull the end back under the wraps with a loop of scrap thread.
Mix the two parts exactly, brush a thin coat over every wrap, and turn the rod a quarter turn every few minutes until it stops sagging.
Guides, wraps and finish
The whole rod from the side, and one guide magnified.
- A Cork grip With the reel seat Epoxied along the spine mark. Step 2 →
- B Guides 5-8, underside Largest nearest the handle, in line with the spine. Step 5 →
- C Wraps Snug turns End pulled under. Step 6 →
- D Finish 1:1, thin About 1/8 in onto the bare blank each side. Step 7 →
Steps 1-2Choose
- Step 1 of 8 · Choose
Choose the blank
Graphite is lighter and more sensitive; fibreglass is heavier but more durable and usually slower in action. Power is how stiff the rod is, action how fast it springs back - and there is no industry standard for the labels (Wikipedia).
Most people: graphite spinning kit (a first rod).
Start here Graphite spinning kitBest forA first rod
Matched parts with a guide spacing chart.
FibreglassBest forSmall streams, rough use
Tough, forgiving and slower.
Fly rod kitBest forFly anglers
One large stripping guide and many small snake guides.
- Step 2 of 8 · Choose
Choose the grip
Cork is the most common grip - light, durable and warm to the touch; EVA foam is the tough alternative (Wikipedia).
Steps 3-6Build
- Step 3 of 8 · Build
Find the spine
Roll the blank under light pressure until it settles into its natural bend, and mark that side; the guides go in line with it. Wikipedia notes fly rod guides are set along the side with the most give to reduce rod twist.
Goes wrong: Ignoring the spine. Guides off the spine can make the rod twist.
- Step 4 of 8 · Build
Glue the handle
Warning: CAUTION Wear gloves and work with ventilation when mixing epoxy and rod finish; repeated skin contact can cause a lasting allergy.
Ream the grip to fit, then epoxy the reel seat and grip in place along the spine mark, and let it cure.
- Step 5 of 8 · Build
Tape the guides in place
Spinning rods typically carry 5 to 8 guides on the underside, the largest nearest the handle (Wikipedia). Follow the kit's spacing chart, tape one foot of each guide down and sight along the rod to line them up.
Goes wrong: Misaligned guides. Crooked guides rub the line.
- Step 6 of 8 · Build
Wrap each guide
Start the thread over its own tail, wind each turn snug against the last, and pull the end back under the wraps with a loop of scrap thread. A cardboard box with two V-notches holds the blank and a heavy book tensions the thread.
Most people: colour-preserved thread (a first rod).
Start here Colour-preserved threadBest forA first rod
Keeps its colour under the finish.
NCP or metallic threadBest forSpecial colours
Needs colour preserver first, or the finish changes its colour (Mud Hole).
Goes wrong: Gappy wraps. Uneven tension leaves gaps.
Steps 7-8Finish and next
- Step 7 of 8 · Finish and next
Apply the finish
Mix the two parts at exactly 1:1, stirring slowly rather than whipping it. Brush a thin coat over every wrap, about 1/8 inch onto the bare blank each side, with the rod turning; a quick pass of an alcohol-burner flame lifts bubbles. Keep it turning through the critical first 3-4 hours; most finishes need 24 hours before the rod is fished (Mud Hole).
Goes wrong: A thick finish. Heavy coats sag and add weight; thin coats, turned while curing.
- Step 8 of 8 · Finish and next
Choose a next build
After a kit, builders choose a direction.
Most people: casting rod (baitcasting reels).
Start here Casting rodBest forBaitcasting reels
Smaller guides on top of the blank, often a trigger grip.
Ultralight or ice rodBest forQuick practice
Short, light rods - good wrapping practice.
Bamboo restorationBest forOld rods
Rewrapping and refinishing split-cane rods.
In shortIf it goes wrong
- Ignoring the spine.
- Step 3 · Find the spine
- Misaligned guides.
- Step 5 · Tape the guides in place
- Gappy wraps.
- Step 6 · Wrap each guide
- A thick finish.
- Step 7 · Apply the finish
How you get better
- First rodA spinning rod kit
Spine, handle, taped guides, plain wraps and two coats of finish.
- Rods 2 and 3Cleaner wraps and trim
Even tension, trim bands and a casting or fly rod.
- Months 3 to 6Choosing your own parts
A blank, grip and guides bought separately, and testing guide placement with line under load.
- Months 6 to 12Decorative wraps
Two-color diamonds, chevrons and simple inlays.
- After thatCustom and restoration
Rods for friends, cork grips shaped from rings, and refurbishing old rods.
- Finding the spine
- Reaming and fitting grips
- Gluing reel seats
- Spacing and aligning guides
- Thread tension
- Plain wraps
- Tying off with a pull loop
- Trim bands
- Mixing and applying finish
- Turning while curing
- Static guide testing
- Decorative and inlay wraps
Small things that help
- Mark the spine before gluing anything.
- Practice wraps on a dowel first.
- Keep thread tension steady with a weight or tensioner.
- Burnish wraps lightly to close tiny gaps.
- Measure finish parts exactly and mix slowly to avoid bubbles.
- Turn the rod until the finish stops moving.
Beginner mistakes
- 01Ignoring the spineGuides off the spine can make a rod twist. Find it first.
- 02Misaligned guidesCrooked guides rub line. Sight along the blank before finishing.
- 03Gappy wrapsUneven tension leaves gaps. Practice and use a tensioner.
- 04Thick finishHeavy coats sag and add weight. Thin coats, turned while curing.
- 05Wrong threadUncoated nylon changes color under finish. Use color preserver or NCP thread.
Wraps, in order of difficulty
| Wrap | What it is |
|---|---|
| Plain guide wrap | Thread wound edge to edge over the guide foot |
| Trim bands | A few turns of a second color at each end |
| Two-color or diamond | Two threads crossed in a counted pattern |
| Inlay | A name or picture woven in from a grid, like cross-stitch on a cylinder |
Why people quit
- 01Gaps in the wrapUneven thread tension. Practice a dozen wraps on a dowel before touching the rod.
- 02The color changedPlain nylon thread turns translucent under finish. Use color preserver or thread sold as NCP.
- 03A sagging finishEpoxy runs to the low side while it sets. Keep turning the rod, by hand or with a slow motor.
Words you will meet
- Blank
- The bare rod shaft without handle or guides.
- Spine
- The blank's natural bending side.
- Guide
- A ring on the rod that the line passes through.
- Tip top
- The guide at the very end of the rod.
- Reel seat
- The part that holds the reel.
- Ferrule
- The joint between sections of a multi-piece rod.
- Wrap
- Thread wound around a guide foot or as decoration.
- Trim band
- A few turns of a second color at the end of a wrap.
- NCP thread
- Thread that keeps its color under finish.
- Action
- Where and how much a rod bends.
Questions people ask
Is building a rod hard?
Not with a kit: it is careful assembly, wrapping and finishing. The wraps take practice to look neat.
Do I need a wrapping machine?
No. A cardboard box with V-notches and a book for tension works for a first rod.
Graphite or fiberglass?
Graphite is lighter and more sensitive; fiberglass is heavier, tougher and often cheaper.
How long does the finish take to cure?
Follow the product; most rod finishes need turning for several hours and a full day or more to cure.
Can I rewrap an old rod?
Yes - cutting off old wraps and rewrapping is a classic way to learn and to restore a rod.
Where to go next
- 01Fly fishingFish with a rod you built. $289 to start
- 02Lure makingMake the lures for it too. $82 to start
How it compares
| Rod building | Fly tying | Fly fishing | Lure making | |
|---|---|---|---|---|
| Start cost | $141 | $128 | $289 | $82 |
| Each month | $10 | $15 | $20 | $10 |
| Space | A long table | A desk corner | A river or pond | A desk |
| Noise | Quiet | Quiet | Quiet | Quiet |
| First result | 2 weekends | 1 evening | A few trips | 1 weekend |
| Mess | Thread ends and epoxy | Feather fluff | Wet boots | Shavings and paint |
Sources: Wikipedia, Fishing rod (history and materials) · Mud Hole Custom Tackle, Epoxy finish
Researched and written by the Fjords Team.