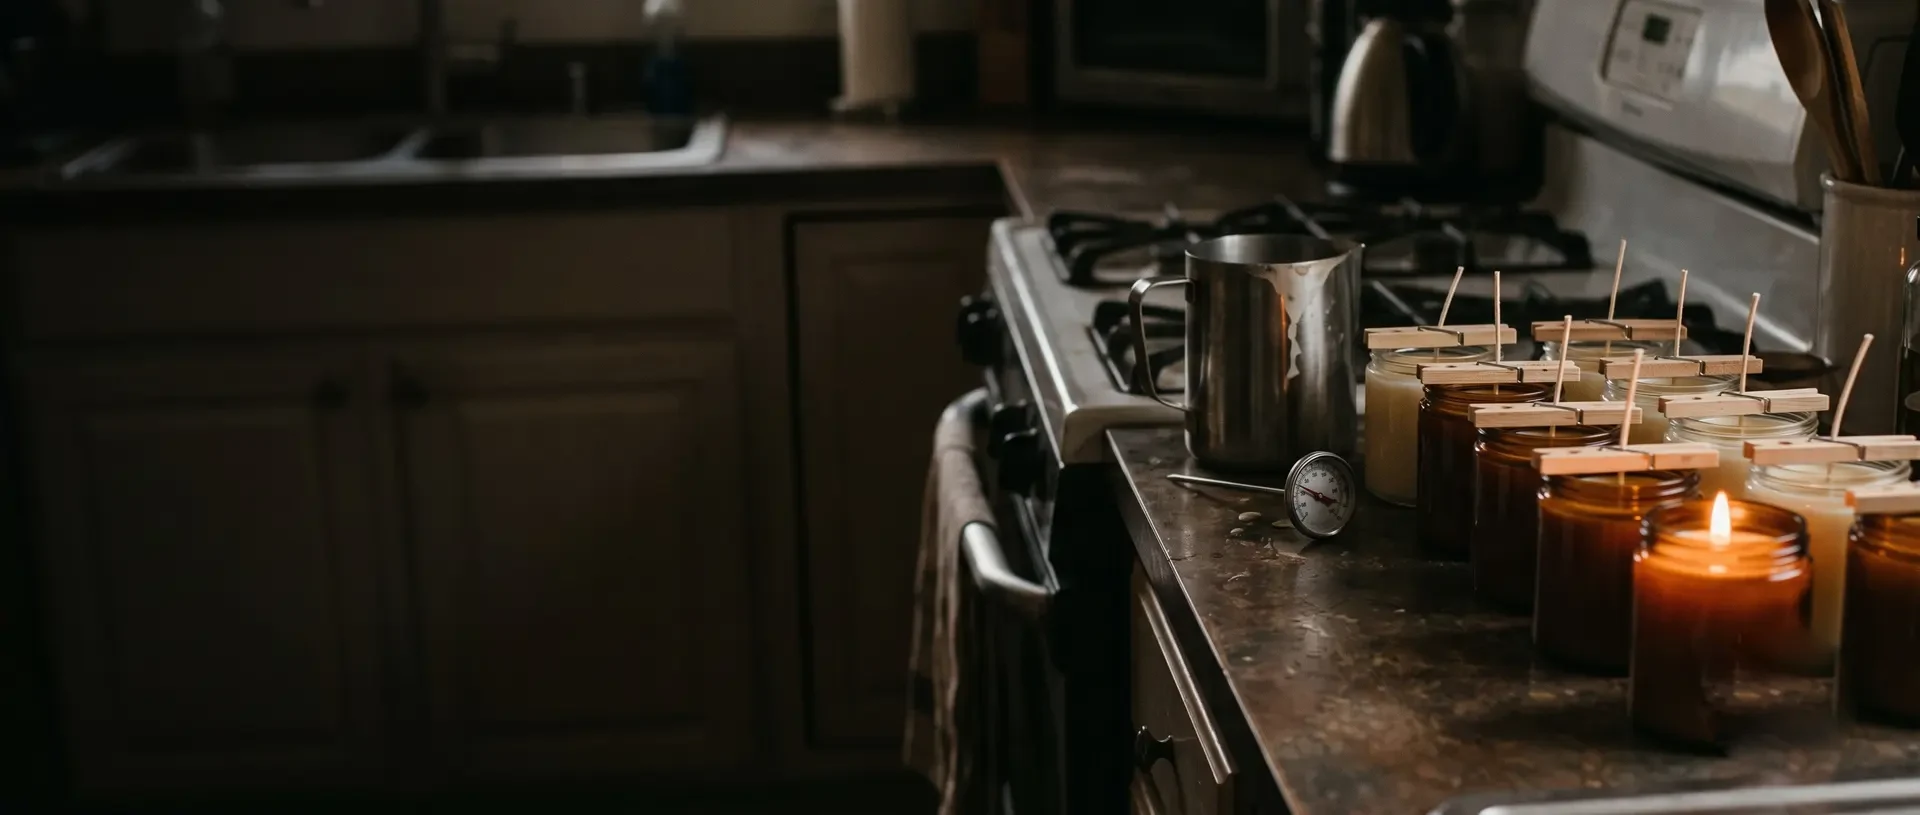
 AI illustration
Candle making
Melt, scent, pour, wait. Container candles are a kitchen craft with a result you can light the next evening.
What it is like
Container candles are the kind you make at home: wax melted in a pitcher, scented, and poured into jars with a wick standing in the middle. There is no carving, no molds and no special room, which is why this is the craft people pick up for a winter and keep because the candles are nicer than the ones in the shop.
The skill is in temperatures and proportions. Fragrance that goes in too cool does not bind; wax poured too hot cracks as it cools; a wick a size too small drowns. None of it is hard, but all of it has to be done by the numbers on the packet, with a thermometer, every time. People who like following a recipe precisely are very good at this.
A candle is a small fuel system. The wick draws melted wax up to the flame, the flame melts more wax into a pool, and the balance between wick size, wax and jar width decides whether that pool reaches the edge cleanly or the candle tunnels, smokes or overheats. That is why candle makers burn-test: the only way to know a wick suits a jar is to light it and watch for a few hours.
The rest is recipe-following. Each wax has its own melting, fragrance and pouring temperatures, and each fragrance has a safe maximum; weighing everything and keeping notes turns a lucky first batch into a candle you can make again. Many makers start with a single wax, wick and jar, change one thing at a time, and end up with a small tested range of scents.
- A session
- Two hours for a batch, including melting and cooling; then overnight setting.
- A week
- A batch a week is plenty; candles need a week or two to cure for best scent.
- Season
- All year; most people make candles in autumn and winter, and for gifts.
Indoors · Solo, For two
Kinds and styles
Wax poured into a jar or tin with the wick standing in it - the method on this page and the easiest to get right.
Freestanding candles cast in a mold, using a harder wax that releases cleanly and holds its shape.
Long, thin candles built up by dipping a wick into melted wax again and again.
Sheets of honeycomb-patterned beeswax rolled around a wick - no melting at all, good with children.
Scented wax without a wick, melted in a warmer; the same recipes as container candles.
Beeswax or plant waxes, dried flowers on the outside of the jar, and scents from candle-safe oils.
Is it for you?
You will probably love it if
- You like a tidy process with measuring and temperatures
- You give a lot of small gifts
- You want a craft that pays for itself in candles you would have bought
Maybe not, if
- A hot stove and a pan of liquid wax is not something your kitchen can host safely
- You want to sell them; candles for sale need testing, labels and insurance
- Scents give you headaches
What to buy first
- 01Soy container wax, 5 lb bagEnough for about eight medium jars; soy is forgiving and cleans up with hot waterFind it on Amazon$22
- 02Pre-tabbed cotton wicks, a packThe size has to match the jar; a pack of one size for one jar is the right startFind it on Amazon$8
- 03Fragrance oil, one small bottleMade for candles; essential oils mostly do not survive the heatFind it on Amazon$9
- 04Pouring pitcherSits in a pan of water as a double boiler and pours without dripsFind it on Amazon$11
- 05ThermometerScent goes in at one temperature and the pour happens at anotherFind it on Amazon$5
- 06Glass jars, a pack of sixStraight-sided, heat-safe jars; never a glass that was not made for a flameFind it on Amazon$20
- Everything you need to beginAbout $10 a month after that$75
Typical US prices for entry-level gear, rounded. Last checked October 2026. How we get the numbers
The Amazon links open a search for that type of item, not a product chosen for us, and the prices in the list are our typical figures, or the listing of the shop a line names, not Amazon's price for any listing. If you buy through one we may earn a commission at no extra cost to you; as an Amazon Associate we earn from qualifying purchases.
What to buy next
- 01Digital scaleWeighing wax and fragrance by weight makes batches repeatableFind it on Amazon From the second batch
- 02Wick sticker tabs and centering barsKeep wicks fixed to the bottom and centered as the wax setsFind it on Amazon Any batch
- 03Wick assortmentSeveral sizes to find the right one for each jarFind it on Amazon Burn testing
- 04Candle dyeDyes made for wax; crayons clog wicksFind it on Amazon Adding color
- 05Heat gunSmooths rough or cracked tops on set candlesFind it on Amazon Fixing tops
- 06Warning labelsBurn-safety instructions belong on every candleFind it on Amazon Giving or selling candles
No prices here on purpose: these are later buys, and what to spend depends on how far the hobby has taken you. The Amazon links work like the ones above: a search for the type of item, and a possible commission for us at no extra cost to you.
From a bag of wax to six container candles, step by step
A candle is a wick drawing melted wax up to the flame by capillary action (Wikipedia). This guide goes from choosing wax, wicks and jars to melting, scenting, pouring and the first burn, with the choices at each step. Temperatures come from the wax maker's packet; safety rules are the National Candle Association's.
Warning: Before you start Wax is flammable and hot. Melt it only in a double boiler, never in a pan straight on the flame or in a microwave, and never leave melting wax unattended. Keep a lid nearby to smother a wax fire; water spreads it. Pour into jars made for candles. Burn finished candles on a heat-safe surface, wicks trimmed, away from drafts, curtains, children and pets, and never leave a lit candle alone.
Newspaper on the counter, jars lined up, a wick stuck to the bottom of each with a dot of hot glue or a sticker, held upright with a clothes peg across the rim.
Weigh the wax into the pitcher and stand it in a pan of simmering water. Stir now and then until it is clear.
Take it off the heat. At the temperature on the wax packet, usually around 180 F, stir in the fragrance oil for two full minutes. About six to eight percent of the wax weight is the usual amount.
Let it cool to the pour temperature on the packet, often around 135 F for soy, then fill each jar to about half an inch below the rim.
Leave them still overnight. Trim the wicks to a quarter inch. Soy candles smell best after a week or two of curing, so label them with the date.
A container candle, cut in half
A finished soy candle in its jar, from the wick tab up to the flame.
- A Wick tab Glued to the centre of the floor before pouring. Step 4 →
- B Stop at ½ in ½ in of wax left The National Candle Association stops burning here. Step 8 →
- C Wax Poured at the packet temperature, about half an inch below the rim. Step 7 →
- D Melt pool Liquid wax the flame draws up the wick. Step 8 →
- E Wick Trimmed to ¼ in Sized for the jar; trimmed before each use. Step 2 →
Steps 1-3Materials
- Step 1 of 9 · Materials
Choose the wax
Wax type changes how a candle burns: Wikipedia notes beeswax and coconut wax burn longer than paraffin or soy, and beeswax burns cleanly.
Most people: soy container wax (first candles).
Start here Soy container waxBest forFirst candles
Forgiving, and cleans up with hot water.
BeeswaxBest forNatural candles
Longer, clean burn; usually poured unscented.
Pillar waxBest forFreestanding candles
Harder wax that releases from a mould and holds its shape.
- Step 2 of 9 · Materials
Match the wick to the jar
The wick's diameter sets the flame's height (Wikipedia), and container candles need a stiff wick that will not sag into the deep pool. Buy wicks sized for your jar's diameter and burn-test.
Goes wrong: The wrong wick size. Too small and the candle tunnels down the middle; too big and the flame smokes and the jar overheats.
- Step 3 of 9 · Materials
Choose jars and fragrance
Straight-sided, heat-safe jars sold for candles, and fragrance oil made for candles; most essential oils do not survive the heat.
Goes wrong: Using any glass. Thin or decorative glass can crack from the heat.
Steps 4-7Making
- Step 4 of 9 · Making
Set up the wicks
Newspaper on the counter, jars lined up, a wick stuck to the bottom of each with a dot of hot glue or a wick sticker, held upright by a clothes peg across the rim.
- Step 5 of 9 · Making
Melt in a double boiler
Warning: WARNING Wax is flammable. Never melt it in a pan straight on the heat or in a microwave, and never leave it unattended; keep a lid nearby to smother a wax fire - water spreads it.
Weigh the wax into a pouring pitcher standing in a pan of simmering water, and stir now and then until clear.
- Step 6 of 9 · Making
Add the fragrance
Off the heat, at the temperature on the wax packet - often around 180°F (82°C) - stir in the fragrance oil for two full minutes. Six to eight per cent of the wax weight is a usual amount; stay within the wax maker's maximum.
Goes wrong: Adding fragrance too cool. Oil added below the recommended temperature does not bind and may sweat out.
- Step 7 of 9 · Making
Pour and wait
Let the wax cool to the pour temperature on the packet - often around 135°F (57°C) for soy - and fill each jar to about half an inch below the rim. Leave them still overnight, then trim the wicks to a quarter inch. Soy candles smell best after a week or two of curing.
Steps 8-9Testing and next
- Step 8 of 9 · Testing and next
Burn-test safely
Heat from the flame melts the top of the wax into a pool that rises up the wick and burns (Wikipedia). The National Candle Association's rules: trim the wick to ¼ inch before each use, keep candles on a stable, heat-resistant surface at least 3 inches apart and away from drafts, children and pets, never leave one burning unattended, and stop when ½ inch of wax remains.
- Step 9 of 9 · Testing and next
Choose what to make next
Once container candles work, most makers try another kind.
Most people: rolled beeswax (with children).
Start here Rolled beeswaxBest forWith children
Sheets rolled around a wick; no melting at all.
Pillar candlesBest forMoulds
Freestanding, from harder wax.
Dipped tapersBest forTraditional candles
Built up by dipping a wick again and again.
In shortIf it goes wrong
- The wrong wick size.
- Step 2 · Match the wick to the jar
- Using any glass.
- Step 3 · Choose jars and fragrance
- Adding fragrance too cool.
- Step 6 · Add the fragrance
How you get better
- First batchSix jar candles from one recipe
One wax, one wick size, one jar and one scent, following the packet temperatures exactly.
- Batches 2 to 4Burn tests
Burning each candle for a few hours to check the melt pool reaches the edge without the flame getting too big, then adjusting wick size.
- Months 2 to 3Scent blends and color
Mixing fragrances, adding candle dye, and trying tins and different jar shapes - each needs its own wick test.
- Months 3 to 6Pillars and tapers
Harder waxes, molds and dipping; different wicks again.
- After thatYour own line
A tested range of scents and sizes, labels with safety warnings, and perhaps selling at markets once the burn tests are consistent.
- Weighing wax and fragrance
- Double-boiler melting
- Using a thermometer
- Fragrance load
- Wick sizing
- Centering wicks
- Pour temperatures
- Avoiding sinkholes and frosting
- Second pours and top-ups
- Curing
- Burn testing
- Safety labeling
Small things that help
- Weigh everything, wax and fragrance, rather than measuring by volume.
- Keep notes of every batch: wax, wick, fragrance load and temperatures.
- Warm the jars slightly before pouring to reduce wet spots where wax pulls away from the glass.
- Burn-test one candle from each batch before giving any away.
- Trim wicks to about a quarter inch before every burn.
- Let soy candles cure a week or two before judging the scent.
Beginner mistakes
- 01Wrong wick sizeToo small and the candle tunnels down the middle; too big and the flame smokes and the jar overheats. Burn-test and adjust.
- 02Adding fragrance too coolOil added below the recommended temperature does not bind and may sweat out. Follow the packet.
- 03Melting wax on direct heatWax can overheat and ignite. Use a double boiler and never leave it unattended.
- 04Using any glassThin or decorative glass can crack from heat. Use jars sold for candles.
- 05Too much fragranceOver the wax's stated limit, oil can seep out and become a fire risk. Stay within the maker's maximum.
Three waxes
Melt points and pour temperatures are rough; the packet for your exact wax wins.
| Wax | Melts at about | Character | Notes |
|---|---|---|---|
| Soy (container blend) | 120 F | Soft, creamy, slow burn | Easy cleanup; can frost on top, which is harmless |
| Paraffin (container) | 130 F | Strong scent throw, glossy | Cheaper; wants good ventilation while melting |
| Beeswax | 145 F | Honey smell, hard, long burn | Expensive; usually poured unscented |
Why people quit
- 01The wrong wickToo thin and the candle tunnels down the middle; too thick and it smokes. Buy wicks sized for your jar diameter and test one before pouring six.
- 02Pouring too hotSinkholes and cracks come from wax that was poured hotter than the packet says. The thermometer is not optional.
- 03Lighting it the same dayA candle lit before the wax has set and cured burns badly and smells of nothing. Give it the night; give it a week if you can.
Words you will meet
- Container wax
- Soft wax made to be poured into jars.
- Pillar wax
- Harder wax that holds its shape out of a mold.
- Fragrance load
- Fragrance oil as a percentage of wax weight.
- Melt pool
- The liquid wax around the flame; it should reach the edge of the jar.
- Tunneling
- A candle burning down the middle and leaving wax on the sides.
- Frosting
- White crystals on soy wax; harmless and only cosmetic.
- Wet spots
- Patches where wax pulls away from the glass.
- Sinkhole
- A dip around the wick as wax shrinks while cooling.
- Cure
- Resting finished candles so the scent develops.
- Hot throw, cold throw
- How strongly a candle smells lit and unlit.
Questions people ask
Which wax is best for beginners?
A soy container wax: forgiving, slow to cool and cleans up with hot soapy water. Follow its packet temperatures.
Can I use essential oils?
Many essential oils lose most of their scent in hot wax; fragrance oils made for candles are more reliable. Use only candle-safe oils.
Why is my candle tunneling?
Usually the wick is too small for the jar, or the first burn was too short. Burn the first time until the melt pool reaches the edge.
How much fragrance should I add?
Follow the wax maker's figure; around six to eight percent of the wax weight is common for soy, and never more than the stated maximum.
Can I sell my candles?
Many people do, but test every recipe with burn tests, put burn-safety warnings on every candle, and check the rules for selling where you live.
Where to go next
- 01BeekeepingYour own beeswax from your own hive. $530 to start
- 02Dried flower wreathsAnother home craft built from things you can grow or gather. $45 to start
How it compares
| Candle making | Natural dyeing | Papermaking | Dried flower wreaths | |
|---|---|---|---|---|
| Start cost | $75 | $65 | $44 | $45 |
| Each month | $10 | $12 | $3 | $10 |
| Space | A kitchen counter | A kitchen counter | A kitchen counter | A table |
| Noise | Quiet | Quiet | Low | Quiet |
| First result | 1 afternoon | 1 weekend | 1 weekend | 1 afternoon |
| Mess | Wax | Pots and splashes | Water and pulp | Dropped petals |
Where to learn more
- 01National Candle AssociationThe US candle industry association, with fire-safety guidance and candle facts.
Sources: National Candle Association, candle safety · Wikipedia, Candle (history)
Researched and written by the Fjords Team.