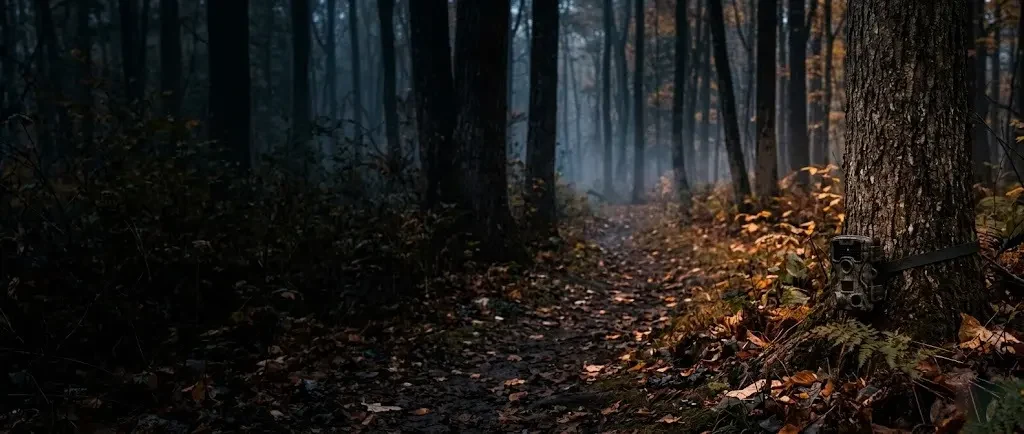
 AI illustration
Trail cameras
Strap a motion-triggered camera to a tree and collect a card two weeks later. Foxes, deer and owls, photographed while you sleep.
What it is like
A trail camera is a weatherproof box with a motion sensor, a lens and a night flash the animals mostly cannot see. It photographs whatever walks past and writes it to a card.
The craft is reading ground. The camera only sees where something walks, so you learn the junctions, the fence gaps and the water. After a season you are running it to meet a particular fox.
The photo library is the result. Sort by camera and date, and by the second year you have a calendar of your patch: who is there in which month, at what hour.
The sensor sees heat in motion. That is why placement matters so much: an animal crossing the detection zone at an angle, a few meters away, is caught cleanly, while one rushing straight past may be gone before the shutter fires, and sun-warmed leaves swaying in the frame trigger hundreds of empty shots. Learning a spot is mostly a series of small adjustments - lower, a little more angle, one more twig cleared - until the photos start showing faces instead of tails.
The rewards build slowly. A first card might hold a deer at dawn and a cat at midnight; a season later the library shows which fox uses which path, when the young appear, and how visitors change with the weather. Sorted by place and date, the photos become a quiet diary of the wild neighbors most people never meet.
- A session
- Half an hour to place a camera; an evening to sort a card.
- A week
- Leave it alone for one to two weeks between checks.
- Season
- All year; each season brings different visitors and behavior.
Outdoors · Solo, For two, With kids
Kinds and styles
A camera on a fence post or garden tree, catching foxes, raccoons, cats and birds close to home.
Cameras at junctions, fence gaps and log crossings in woods you have permission to use.
Ponds, streams and fruit trees where many animals come, with delays so one visitor does not fill the card.
Short clips that show behavior - grooming, play, calls - instead of single frames.
Careful, distant placement to record without disturbing breeding animals, where rules allow.
Sharing photos with wildlife surveys that use camera traps to map species.
Is it for you?
You will probably love it if
- You have land, or permission on someone else's
- You like opening a surprise
- You enjoy sorting photos and spotting individuals
Maybe not, if
- You have nowhere you are allowed to leave a camera
- You will check it every day: that scares everything off
- You want to be outdoors more than you want pictures
What to buy first
- 01Entry-level trail cameraMotion sensor, night flash and a strap are all it needsFind it on Amazonor at Rexing$40
- 02SD cards, 32 GB, 2Swap cards in thirty seconds instead of taking the camera homeFind it on Amazon$25
- 03AA lithium batteries, 8 packLast months and keep working in the coldFind it on Amazon$21
- Everything you need to beginAbout $5 a month after that$86
Typical US prices for entry-level gear, rounded. Last checked October 2026. How we get the numbers
The Amazon links open a search for that type of item, not a product chosen for us, and the prices in the list are our typical figures, or the listing of the shop a line names, not Amazon's price for any listing. If you buy through one, or through a shop link in the same row, we may earn a commission at no extra cost to you; as an Amazon Associate we earn from qualifying purchases.
What to buy next
- 01Lock box or cable lockDeters theft and curious handsFind it on Amazon Cameras in shared places
- 02Tree mount or bracketAims the camera exactlyFind it on Amazon Tricky angles
- 03SD card readerCheck cards on a phone or laptopFind it on Amazon Viewing in the field
- 04Rechargeable lithium AA batteriesCuts battery wasteFind it on Amazon Regular use
- 05Second cameraCompare locations and anglesFind it on Amazon After learning one spot
No prices here on purpose: these are later buys, and what to spend depends on how far the hobby has taken you. The Amazon links work like the ones above: a search for the type of item, and a possible commission for us at no extra cost to you.
From a first camera to wildlife you never see, step by step
A trail camera fires when something warm moves in front of it. This guide goes from permission and choosing the camera to placement, settings and what to do with the photos, with the choices at each step. Placement and privacy points follow the Wisconsin DNR's Snapshot Wisconsin programme, which runs cameras with volunteers.
Warning: Before you start Put cameras only where you have permission. Rules on public land vary, and some states restrict trail cameras - since 2022 Arizona, for example, prohibits using them to take or locate wildlife for hunting, while photography and research remain allowed. Check your state wildlife agency. Never aim a camera at paths, homes or anywhere people expect privacy, and expect that a camera left on a boundary may be stolen.
Your own land or the owner's clear yes. On public land read that land's rules first.
A trail junction, a gap in a fence, a log across a creek. Animals walk where walking is easy.
Knee to waist high, tilted slightly down, pointed along the trail at about 45 degrees and facing north. Clear every twig within a meter of the lens.
Date and time first. Then a three-shot burst with a short delay.
Two full weeks. Swap the card at midday and walk out the way you came in.
Placing one camera
From above at a trail junction, and from the side on its tree.
- A Pinch point Junction or gap Where walking is easy. Step 3 →
- B Cleared metre One metre No twigs to trigger it. Step 4 →
- C Aim About 45° to the trail Facing north if possible, away from the sun. Step 4 →
- D Height Knee to waist Tilted slightly down. Step 4 →
Steps 1-2Before the woods
- Step 1 of 8 · Before the woods
Get permission
Your own land, or the owner's clear yes. Snapshot Wisconsin asks its volunteers to own the property or have permission from the landowner or public land manager, and some states restrict trail cameras - Arizona, for example, bars using them to take or locate wildlife for hunting. Check your state wildlife agency.
Goes wrong: Cameras on land you do not have permission for. They get removed, or cause trouble.
- Step 2 of 8 · Before the woods
Choose the camera
Most cameras are triggered by a passive infrared sensor that reacts to movement and body heat (Wikipedia).
Most people: infrared (no-glow) flash (most wildlife).
Start here Infrared (no-glow) flashBest forMost wildlife
Wikipedia notes infrared is usually undetectable to mammals and birds and disturbs them less; night photos are black and white.
White flashBest forColour night photos
Colour after dark, but a visible flash may scare animals off.
Video and soundBest forBehaviour
Short clips show grooming, play and calls instead of single frames.
Steps 3-5Setting it up
- Step 3 of 8 · Setting it up
Pick a pinch point
Animals walk where walking is easy: a trail junction, a gap in a fence, a log across a creek. Wikipedia adds game trails and mineral licks, and for one species its runs, dens, beds and feeding places, found by tracks and scat.
Most people: woodland trail (deer, foxes, raccoons).
Start here Woodland trailBest forDeer, foxes, raccoons
A junction or crossing in woods you may use.
Water or fruit treesBest forMany species
A delay setting stops one visitor filling the card.
Back gardenBest forClose to home
A fence post or garden tree; foxes, cats and birds.
- Step 4 of 8 · Setting it up
Set height and angle
Knee to waist high, tilted slightly down, pointed along the trail at about 45 degrees and facing north if possible, away from the sun. Clear every twig within a metre of the lens: Wikipedia lists wind-blown vegetation among the commonest causes of empty frames.
Goes wrong: Mounted too high. You get backs and sky.
- Step 5 of 8 · Setting it up
Set the menu
Date and time first, so every photo is stamped. Then a short burst of shots with a short delay between triggers.
Steps 6-8Collecting and sharing
- Step 6 of 8 · Collecting and sharing
Leave it alone
Two full weeks. Swap the card at midday and walk out the way you came in. Snapshot Wisconsin's volunteers change batteries and collect photos at least every 90 days; lithium AA batteries last longer and keep working in the cold.
Goes wrong: Checking every day. Your scent and noise push the animals away.
- Step 7 of 8 · Collecting and sharing
Keep people out of the frame
Warning: NOTICE Never aim a camera at paths, homes or anywhere people expect privacy.
Snapshot Wisconsin places cameras away from places people use, at least 100 yards from buildings and paved roads, and removes photos of humans before anything is shared.
- Step 8 of 8 · Collecting and sharing
Share the photos
Name and count what you caught. Anyone can classify Snapshot Wisconsin's photos on Zooniverse, and that data tracks where species live and how their numbers change - a way to learn identification from thousands of other cameras.
In shortIf it goes wrong
- Cameras on land you do not have permission for.
- Step 1 · Get permission
- Mounted too high.
- Step 4 · Set height and angle
- Checking every day.
- Step 6 · Leave it alone
How you get better
- First two weeksOne camera, one trail
A pinch point, a cleared frame, the right height and angle, and patience.
- First monthsLearning a spot
Moving the camera a few meters at a time to improve shots.
- First seasonVideo and behavior
Short clips at water, dens or feeding spots, and a sorted photo library.
- Year 1A second camera
Two spots compared, and a calendar of who appears when.
- After thatIndividuals and surveys
Recognizing individual animals and sharing data with citizen science projects.
- Getting permission
- Reading animal travel routes
- Choosing pinch points
- Setting height and angle
- Clearing the frame
- Menu settings
- Choosing photo, burst or video
- Minimizing scent and visits
- Sorting and tagging photos
- Identifying species
- Recognizing individuals
- Securing cameras
Small things that help
- Point the camera along a trail, not straight across it.
- Face north where possible to avoid sun glare.
- Clear moving plants from the frame.
- Set the date and time before deploying.
- Visit rarely, at midday, the same way each time.
- Label photos with place and date as you sort them.
Beginner mistakes
- 01Mounted too highYou get backs and sky. Knee to waist height, angled slightly down.
- 02Facing the sunGlare and false triggers. Face north if you can.
- 03Checking every dayYour scent and noise push animals away. Two weeks.
- 04No permissionCameras on land you do not have permission for can be removed or cause trouble. Ask first.
- 05Aiming at peopleNever point cameras at paths, homes or private areas.
Settings by location
| Spot | Mode | Why |
|---|---|---|
| Trail | 3-shot burst, short delay | The animal is passing through |
| Water or feeding area | Burst with a 1 to 5 minute delay | One animal can fill the card |
| Den, scrape or perch | 10 to 20 second video | Shows behavior and sound |
| Open field | Time-lapse at dawn and dusk | Covers animals beyond sensor range |
Why people quit
- 01Four thousand photos of a fernMoving plants in front of the sensor trigger it all day. Clear the frame.
- 02Sky and empty framesMounted too high, or square across the trail. Lower it and angle it along the path.
- 03Checking too oftenEvery visit leaves scent. Two cards and two weeks.
Words you will meet
- Camera trap
- The research name for a motion-triggered wildlife camera.
- PIR sensor
- A passive infrared sensor that detects moving warmth.
- Trigger speed
- How fast the camera fires after detecting motion.
- Detection zone
- The area where the sensor notices movement.
- No-glow flash
- Infrared light invisible to people and most animals.
- Burst
- Several photos taken quickly per trigger.
- Delay
- The pause before the camera can trigger again.
- Time-lapse
- Photos taken at set intervals regardless of motion.
- Pinch point
- A narrow spot where animals must pass.
Questions people ask
Where should I put my first trail camera?
On a trail junction, fence gap or log crossing, at knee to waist height, angled along the path.
How long should I leave it?
One to two weeks; frequent visits leave scent and disturb animals.
Do animals see the flash?
Infrared flashes are low in visibility; no-glow models are hardest to notice.
Is it legal to use trail cameras?
On your own land usually yes; public land and hunting uses can be restricted, as in Arizona. Check local rules.
What can I do with the photos?
Build a record of your area, recognize individuals, and share with citizen science projects.
Where to go next
- 01Track castingThe prints in the mud by your camera, cast in plaster and matched to the photos. $7 to start
- 02BirdwatchingIdentifying what you see, by day and in person. $161 to start
How it compares
| Trail cameras | Birdwatching | Track casting | Stargazing | |
|---|---|---|---|---|
| Start cost | $86 | $161 | $7 | $82 |
| Each month | $5 | Free | $1 | Free |
| Space | Woods or a big yard | Anywhere outside | Muddy trails | A dark backyard |
| Noise | Quiet | Quiet | Quiet | Quiet |
| First result | 2 weeks | Same day | 1 walk | One clear night |
| Mess | None | None | Plaster and mud | None |
Sources: Wikipedia, Camera trap · goHUNT, Arizona trail camera rule (R12-4-303.A.5) · Wisconsin DNR, Snapshot Wisconsin FAQ
Researched and written by the Fjords Team.