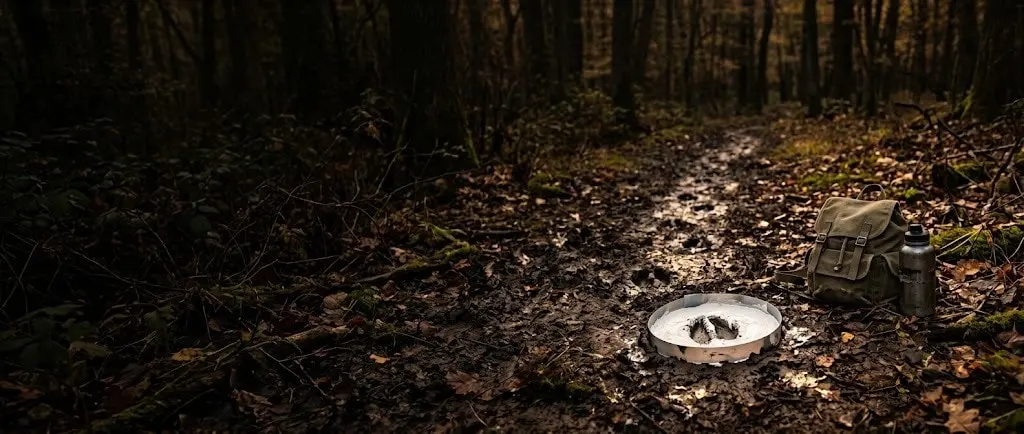
 AI illustration
Track casting
Find an animal track in firm mud, pour plaster into it, and take the print home. One bag of plaster covers a season.
What it is like
A track is a record of one animal on one day. Plaster turns it into an object: pour it in, wait half an hour, and you lift out a raised copy of the foot.
It is close to free, it works on any walk with mud, and it teaches tracking faster than a book does. Before you pour, read the ground around the print: direction, gait, what the animal was doing. That note is what turns a plaster disc into a specimen.
Label every cast on the back with date, place and species. A shelf of them is a field guide to your own patch.
Good casts start with good reading. Trackers look at a print with the light low and to one side, when ridges cast shadows - early morning and late afternoon are best - and they count toes, look for claw marks, and measure length, width and the distance between prints. One print says who; a line of them says what the animal was doing, whether walking calmly, trotting or bounding away.
The plaster does the rest. Poured into a collar beside the print, it creeps into every toe and pad, warms slightly as it sets and lifts out as a raised copy of the foot. Labeled with the date, place and species, a cast becomes a small specimen - and a shelf of them becomes a record of the animals that share your local paths.
- A session
- An hour's walk, plus thirty minutes of waiting while a cast sets.
- A week
- Whenever you walk somewhere muddy.
- Season
- All year; the best prints come after rain, and in snow in winter.
Outdoors · Solo, For two, With kids
Kinds and styles
Deer, raccoon, fox and bird tracks in firm mud at pond and trail edges - the classic cast.
Thick, cold-mixed plaster poured into prints in firm or refrozen snow; tricky but possible.
Heron, goose and duck prints in shoreline mud, often in long lines.
Several casts in a row from one animal, showing its gait and stride.
A second casting made from the first, giving a true copy of the hollow print.
Photos, sketches and measurements of prints you do not cast, building a record of your area.
Is it for you?
You will probably love it if
- You walk outdoors anyway and want a reason to look down
- You have children who like mud and results
- You enjoy working out who passed and what they were doing
Maybe not, if
- You want something to do indoors
- Waiting half an hour beside a puddle sounds dull
- You only walk on paved paths
What to buy first
- 01Plaster of Paris, 4 lbEnough for a dozen or more castsFind it on Amazon$7
- 02A strip cut from a plastic bottle and a paper clipBent into a ring, it dams the plaster around the printFree
- 03A cup, a spoon and a bottle of waterMixing kit; carry the plaster dry in a zip bagFree
- 04Newspaper and a bagThe fresh cast travels home wrapped, mud and allFree
- Everything you need to beginAbout $1 a month after that$7
Typical US prices for entry-level gear, rounded. Last checked October 2026. How we get the numbers
The Amazon links open a search for that type of item, not a product chosen for us, and the prices in the list are our typical figures, or the listing of the shop a line names, not Amazon's price for any listing. If you buy through one we may earn a commission at no extra cost to you; as an Amazon Associate we earn from qualifying purchases.
What to buy next
- 01Regional animal track guideIdentifies prints, gaits and other signsFind it on Amazon After a few casts
- 02Small ruler and scale cardMeasurements and scale in photosFind it on Amazon Every print
- 03Dental stoneHarder and more detailed than plaster of ParisFind it on Amazon Finer detail
- 04Collapsible bucketEasier mixing and clean-upFind it on Amazon Mixing outdoors
- 05Specimen shelf labelsDate, place and species with each castFind it on Amazon Building a collection
No prices here on purpose: these are later buys, and what to spend depends on how far the hobby has taken you. The Amazon links work like the ones above: a search for the type of item, and a possible commission for us at no extra cost to you.
From a print in the mud to a cast on the shelf, step by step
A track cast is a plaster copy of a footprint. This guide goes from finding a clean print to lifting and cleaning the cast, with the choices at each step and what tends to go wrong. Ask about the rules first: many parks and nature centres regulate leaving the trail and disturbing wildlife.
Warning: Before you start Plaster warms as it sets: never cast a hand or any body part in it, and do not breathe the dry powder. Stay on land you are allowed to walk, follow park rules about leaving the trail, carry out every scrap of plaster, and leave nests, dens and animals alone.
Firm, slightly damp mud at a pond edge or trail side. Clear walls, visible toe pads, no standing water. Photograph it with a coin for scale.
Press the plastic ring a centimeter into the ground around the track.
About two parts plaster into one part water. Always plaster into water, then stir smooth and tap out the bubbles.
Never straight into the print. Let the plaster flow in from beside it and fill the ring at least 2 cm deep.
Twenty to thirty minutes. Dig under the whole disc, lift it with its mud, wrap it in newspaper and clean it at home after a day or two.
A cast in progress, cut in half
The print, the collar and the plaster seen in section, as the cast sets.
- A The print Firm, slightly damp mud with clear walls and no standing water. Step 1 →
- B Soil packed outside Pushed against the collar so plaster cannot leak out. Step 3 →
- C Plaster At least 2 cm deep About two parts plaster to one of water, bubbles tapped up. Step 5 →
- D Collar About 1 cm into the ground A ring of plastic or card held with a paper clip. Step 3 →
- E Pour from the side Let it run in beside the print, never straight into it. Step 5 →
Steps 1-3Find and prepare
- Step 1 of 7 · Find and prepare
Find a clean print
Firm, slightly damp mud at a pond edge or trail side holds the best prints: clear walls, visible toe pads and no standing water. Photograph it first with a coin for scale, in case the cast fails.
Most people: mud prints (first casts).
Start here Mud printsBest forFirst casts
Deer, raccoon, fox and heron prints at pond and trail edges.
Snow printsBest forWinter, with practice
Firm or refrozen snow and plaster mixed cold; tricky but possible.
- Step 2 of 7 · Find and prepare
Clean it gently
Lift out loose twigs and leaves with your fingers or tweezers without touching the walls of the print.
- Step 3 of 7 · Find and prepare
Set a collar around it
Bend a strip cut from a plastic bottle or card into a ring held with a paper clip, press it about a centimetre into the ground around the print and push loose soil against the outside so plaster cannot leak out.
Goes wrong: No collar. Thin casts snap; dam the print so the plaster can be poured deep.
Steps 4-5Cast
- Step 4 of 7 · Cast
Mix the plaster
Warning: CAUTION Do not breathe the dry powder, and never cast a hand or any part of the body: plaster warms as it sets.
About two parts plaster to one part water, always plaster into water, stirred smooth - the Hoven School District's classroom guide aims for the consistency of applesauce. Tap the cup to bring up bubbles. It begins to set at once, so pour straight away.
Goes wrong: Runny plaster. It sets slowly and loses detail.
- Step 5 of 7 · Cast
Pour from the side
Let the plaster run in from beside the print, never straight into it, and fill the collar at least 2 cm deep.
Goes wrong: Pouring straight in. It washes out the details.
Steps 6-7Afterwards
- Step 6 of 7 · Afterwards
Wait, lift and wrap
The classroom guide finds plaster dry enough to move after about 20 minutes. Dig under the whole disc, lift it with its mud, wrap it in newspaper and carry out every scrap of plaster.
Goes wrong: Cleaning too soon. A fresh cast is weak; leave the mud on overnight.
- Step 7 of 7 · Afterwards
Clean, label and choose a next project
After a day or two, rinse the mud off under running water and brush it with a soft paintbrush. Write the date, place and animal on the back.
Most people: a track journal (prints you do not cast).
A track trailBest forSeeing how an animal moves
Several casts in a row from one animal show its gait and stride.
A positive castBest forA true copy
A second casting taken from the first gives the print as it was in the ground.
Start here A track journalBest forPrints you do not cast
Photos, sketches and measurements build a record of your area.
In shortIf it goes wrong
- No collar.
- Step 3 · Set a collar around it
- Runny plaster.
- Step 4 · Mix the plaster
- Pouring straight in.
- Step 5 · Pour from the side
- Cleaning too soon.
- Step 6 · Wait, lift and wrap
How you get better
- First walkA first cast
One clear print, a collar, thick plaster poured from the side, and patience.
- First monthIdentifying
Matching casts and photos to species with a regional track guide.
- Months 2 to 4Gait and trails
Measuring strides, reading how animals moved and casting a short trail.
- Months 4 to 12Seasons
Spring mud, summer pond edges, autumn and winter snow.
- After thatA track collection
A labeled shelf of casts, positive casts, and perhaps tracking courses or wildlife surveys.
- Finding good tracking ground
- Recognizing a clear print
- Photographing with scale
- Building a collar
- Mixing plaster
- Pouring without damage
- Lifting and transporting
- Cleaning and curing
- Identifying tracks
- Reading gait and direction
- Measuring stride
- Labeling specimens
Small things that help
- Look for prints in firm, damp mud after rain.
- Photograph every print with a coin or ruler for scale.
- Always add plaster to water, not water to plaster.
- Pour beside the print and let it flow in.
- Wait at least twenty minutes before lifting.
- Clean casts at home after they have dried for a day or two.
Beginner mistakes
- 01Runny plasterIt sets slowly and loses detail. Mix to pancake batter.
- 02No collarThin casts snap. Dam the print and pour deep.
- 03Pouring straight inIt washes out the details. Pour from the side.
- 04Cleaning too soonFresh casts are weak. Wait a day or two.
- 05Leaving plaster behindPack out every scrap.
Where prints hold detail
| Ground | Quality | Tip |
|---|---|---|
| Firm mud after rain | Best | Cast within a day |
| Pond and stream margins | Very good | Avoid prints with standing water |
| Dust or dry sand | Poor | Mist with water or hairspray first |
| Refrozen snow | Possible | Mix the plaster thick and cold |
Why people quit
- 01Thin casts that snapWithout a collar the plaster spreads into a wafer. Dam it and pour 2 cm deep.
- 02Cleaning in the fieldA fresh cast is at half strength. Brush the mud off at home, days later.
- 03Runny plasterToo much water sets slowly and loses the toes. Thick batter, not milk.
Words you will meet
- Track
- A single footprint.
- Trail
- A line of tracks made by one animal.
- Gait
- The way an animal moves: walking, trotting, bounding.
- Stride
- The distance between repeated prints of the same foot.
- Spoor
- All the signs an animal leaves, including tracks.
- Pugmark
- The footprint of a large animal such as a big cat.
- Collar
- A ring around a print that holds the plaster.
- Positive cast
- A copy made from the first cast, showing the print as it was in the ground.
- Ichnology
- The study of traces such as footprints and burrows.
- Plaster of Paris
- Powdered gypsum plaster that sets hard with water.
Questions people ask
What is the best plaster for track casting?
Plaster of Paris is cheap and easy; dental stone is harder and holds finer detail.
How long does a cast take to set?
About twenty to thirty minutes before lifting, and a day or two before cleaning.
Can I cast tracks in snow?
Sometimes, in firm or refrozen snow, with thick, cold plaster - setting plaster gives off heat and can melt fine snow.
How do I identify a track?
Count toes, look for claws, measure length and width, and check the gait with a regional field guide.
Is it good for children?
Yes, with an adult handling the plaster; never cast hands or body parts.
Where to go next
- 01Trail camerasA camera at the same spot shows which animal made the prints. $86 to start
- 02Shed huntingReading tracks and trails is how shed hunters find where deer spend the winter. Free to start
How it compares
| Track casting | Birdwatching | Shed hunting | Geocaching | |
|---|---|---|---|---|
| Start cost | $7 | $161 | Free | Free |
| Each month | $1 | Free | Free | $3 |
| Space | Muddy trails | Anywhere outside | Fields and woods | The whole town |
| Noise | Quiet | Quiet | Quiet | Quiet |
| First result | 1 walk | Same day | A few walks | The first find |
| Mess | Plaster and mud | None | Muddy boots | None |
Sources: Wikipedia, Tracking (hunting) · Wikipedia, Animal track · Wikipedia, Plaster · Wikipedia, Trace fossil (ichnology) · Hoven School District, Animal tracks plaster casting
Researched and written by the Fjords Team.