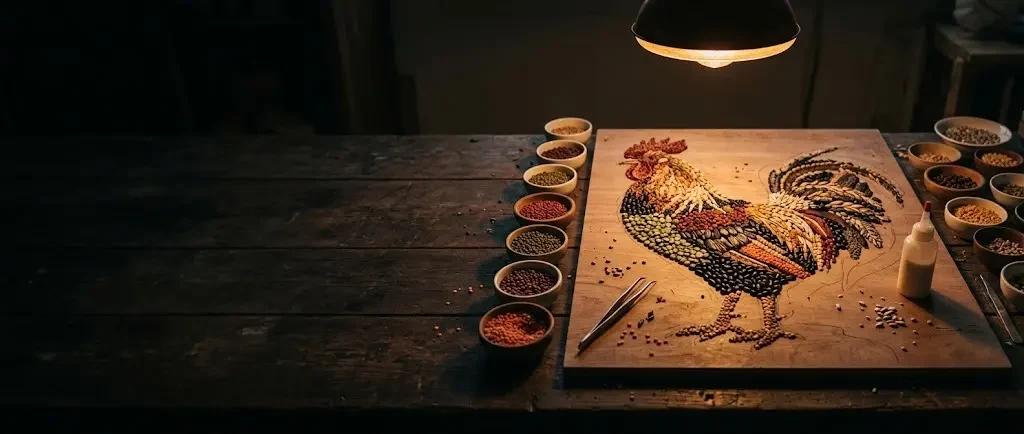
 AI illustration
Seed mosaics
Beans, lentils and garden seed glued into pictures. The palette costs a few dollars and the method is glue, place, press, repeat.
What it is like
Seed art is mosaic with a free palette. Lentils give red and green, split peas yellow, beans every shade from white to black, and a garden adds poppy, sunflower, nigella and the silver discs of honesty.
Two mosaic rules do most of the work. Lay outlines before fills, and decide which way the seeds point: all one direction reads calm, a swirl reads like fur or water.
An evening disappears into it the way it used to with coloring books. The finished piece hangs unglazed, because the texture is the whole appeal.
Seeds behave like the pixels of a very low-resolution picture, so the design has to be bold. Strong outlines in a dark seed, then fills in two or three contrasting colors, read clearly across a room; fine detail turns to noise. The shape of each seed adds a second layer: round lentils give an even texture, long rice or grass seed can be laid in rows that suggest fur, feathers or water, and big beans make strong accents.
The craft has a long American folk history, from corn palaces covered in colored cobs to the crop art at state fairs, where entrants use only seeds from local farm crops and gardens. At home it is simpler: a board, a bottle of glue, a few bags from the pantry and an evening of quiet, patient placing.
- A session
- An evening for a small board; larger pictures over several sessions.
- A week
- A few evenings for a detailed piece.
- Season
- All year; autumn brings garden seed to save.
Indoors · Solo, For two, With kids
Kinds and styles
Beans, lentils, split peas and rice from the kitchen - cheap, colorful and the place to start.
Poppy, sunflower, nigella, honesty and other saved seeds for finer textures.
Rings and repeats that suit the round, regular shapes of seeds.
The crop art tradition of faces and scenes, built from careful outlines and shading in seed color.
Large beans on card with plenty of glue - a classic rainy-day craft with an adult nearby.
Large-scale work with cobs, grains and stalks, in the spirit of the corn palaces.
Is it for you?
You will probably love it if
- You liked coloring in and want the grown-up version
- You have children old enough not to eat the materials
- You save seed or keep a deep pantry
Maybe not, if
- You want fine detail: seeds are coarse pixels
- Sorting small things by color sounds like a chore
- You have pantry moths and no plan to seal the work
What to buy first
- 01Dried beans, lentils and split peas, 5 small bagsRed, green, black, white and speckled cover most pictures$8
- 02PVA glue, a small bottleDries clear and holds seed to boardFind it on Amazon$9
- 03Wood panel or heavy board, 8 x 10 inchCard curls under wet glue; a rigid base stays flatFind it on Amazon$10
- 04Pointed tweezersFor outlines and single seedsFind it on Amazon$4
- 05Clear acrylic sealer, sprayUnsealed seed is food for insectsFind it on Amazon$9
- Everything you need to beginAbout $4 a month after that$40
Typical US prices for entry-level gear, rounded. Last checked October 2026. How we get the numbers
The Amazon links open a search for that type of item, not a product chosen for us, and the prices in the list are our typical figures, or the listing of the shop a line names, not Amazon's price for any listing. If you buy through one we may earn a commission at no extra cost to you; as an Amazon Associate we earn from qualifying purchases.
What to buy next
- 01Wild rice, quinoa and colored lentilsFine textures and new colorsFind it on Amazon Expanding the palette
- 02Sorting traysKeeps each seed color separate and to handFind it on Amazon Larger pieces
- 03Larger wood panelsRigid bases that do not curlFind it on Amazon Bigger pictures
- 04Matte varnishSeals without a plastic shineFind it on Amazon Finishing
- 05Glue applicator bottlePrecise glue lines for outlinesFind it on Amazon Fine areas
No prices here on purpose: these are later buys, and what to spend depends on how far the hobby has taken you. The Amazon links work like the ones above: a search for the type of item, and a possible commission for us at no extra cost to you.
From a jar of beans to a sealed seed picture, step by step
Seed art fixes seeds to a background in a mosaic, much like pointillism or needlepoint (Wikipedia). This guide goes from choosing safe seeds and a board to designing, outlining, filling and sealing, with the choices at each step.
Warning: Before you start Use food seeds and common garden seed only. Never use castor beans or rosary peas (jequirity beans): castor seeds contain ricin, rosary pea seeds contain abrin, and a single well-chewed rosary pea can be fatal. Rosary peas are used as beads, so they can turn up in craft supplies. Small seeds are a choking hazard for children under three. Spray sealer outdoors.
Dry garden seed for a week on trays, then sort everything by color into jars or cups.
Pencil the design on the board. Bold and simple reads best: a flower, a bird, rings of a mandala.
Lay the dark outline seeds with tweezers. A careful edge makes any fill inside it look deliberate.
Spread glue over an area the size of two coins, place or pour the seed, press flat, move on.
When the glue has dried clear, give it two light coats of sealer, and seal the back of the board too.
A picture half made
From above: outlines first, then the fills, one small patch of glue at a time.
- A Dark outline Laid first With pointed tweezers. Step 5 →
- B Filled area One colour each Glue, seed, press. Step 6 →
- C Wet glue Two coins wide Seed placed or poured on, pressed flat. Step 6 →
- D Pencil line Big shapes Seeds are coarse pixels. Step 4 →
- E Board Rigid, about 8 x 10 in Sealed on the back at the end. Step 2 →
Steps 1-3Prepare
- Step 1 of 7 · Prepare
Choose safe seeds
Warning: WARNING Never use castor beans or rosary peas (jequirity beans): castor seeds contain ricin and rosary peas contain abrin, and rosary peas turn up as craft beads. Small seeds are a choking hazard for children under three.
Food seeds and common garden seed only.
Most people: pantry seeds (a first picture).
Start here Pantry seedsBest forA first picture
Beans, lentils, split peas and rice: red, green, black, white and speckled cover most designs.
Saved garden seedBest forFine texture
Poppy, sunflower, nigella and others, dried on trays for a week first.
- Step 2 of 7 · Prepare
Choose a rigid board
A wood panel or heavy board, about 8 x 10 in to start.
Goes wrong: Thin card. It curls as the glue dries.
- Step 3 of 7 · Prepare
Sort the palette
Sort every seed by colour into jars or cups, so each area can be filled from one container.
Steps 4-6Make the picture
- Step 4 of 7 · Make the picture
Draw big, simple shapes
Pencil the design on the board. Seeds are coarse pixels: a flower, a bird or the rings of a mandala read best.
Goes wrong: Too much detail. Fine lines disappear in seed; simplify.
- Step 5 of 7 · Make the picture
Lay the outlines first
Lay the dark outline seeds with pointed tweezers. A careful edge makes any fill inside it look deliberate.
- Step 6 of 7 · Make the picture
Fill in small patches
Spread PVA glue over an area the size of two coins, place or pour the seed, press it flat and move on.
Most people: seed by seed (rows and patterns).
Start here Seed by seedBest forRows and patterns
Each seed placed with tweezers, in lines that follow the shape.
PouredBest forLarge backgrounds
Small seed poured onto the glue and pressed, the excess tipped off.
Goes wrong: Glue over too large an area. It dries before you fill it.
Step 7Next
- Step 7 of 7 · Next
Seal it, and choose a next piece
When the glue has dried clear, give the front two light coats of clear sealer, sprayed outdoors, and seal the back of the board too - unsealed seed attracts insects. The tradition goes much bigger: the Mitchell Corn Palace in South Dakota, first built in 1892, is covered in murals of coloured corn, and the Minnesota State Fair's crop-art category accepts only seeds of Minnesota-grown crops and cultivated plants (Wikipedia).
Most people: mandalas and patterns (regular designs).
Start here Mandalas and patternsBest forRegular designs
Rings and repeats that suit round seeds.
Portraits and scenesBest forCrop-art tradition
Faces and landscapes shaded with seed colour.
In shortIf it goes wrong
- Thin card.
- Step 2 · Choose a rigid board
- Too much detail.
- Step 4 · Draw big, simple shapes
- Glue over too large an area.
- Step 6 · Fill in small patches
How you get better
- First eveningA sunflower on a board
Sorted pantry seeds, outlines first, fills second, sealed the next day.
- First monthPatterns
Mandalas and borders that play with seed direction and repetition.
- Months 2 to 4Garden seeds
Saving and drying seeds from the garden for a wider palette.
- Months 4 to 12Pictures and shading
Animals, landscapes and simple portraits with gradual changes of seed color.
- After thatCrop art
Larger panels, fair entries following local crop art rules, and teaching others.
- Choosing and sorting seeds
- Drying garden seed
- Drawing bold designs
- Laying outlines
- Filling patches
- Directional placing
- Using tweezers
- Shading with seed color
- Working in small glue areas
- Sealing
- Mounting and hanging
- Saving seed from the garden
Small things that help
- Sort seeds by color before you start.
- Keep designs bold and simple at first.
- Lay outlines with tweezers before filling.
- Glue small areas at a time so it does not skin over.
- Point seeds in one direction for calm areas and swirl them for movement.
- Seal the front and the back.
Beginner mistakes
- 01Skipping the sealerSeed can attract insects. Seal every piece.
- 02Thin cardIt curls as the glue dries. Use a rigid panel.
- 03Too much detailSeeds are coarse pixels. Simplify.
- 04Glue over too large an areaIt dries before you fill it. Work in small patches.
- 05Unknown seedsSome seeds, like rosary peas and castor beans, are poisonous. Use food and common garden seed.
Why people quit
- 01InsectsUnsealed seed can attract pantry moths and other insects. Sealing is not optional.
- 02A curled baseThin card warps as the glue dries. Use a rigid panel.
- 03Too much detailA face in lentils fails. Start with shapes a child could draw.
Words you will meet
- Seed mosaic
- A picture made by gluing seeds to a background.
- Crop art
- Seed and plant art, especially the Minnesota State Fair category.
- Palette
- The set of seed colors used in a piece.
- Outline
- The line of seeds marking the edge of a shape.
- Fill
- Seeds covering the area inside an outline.
- Direction
- Which way elongated seeds point, giving movement.
- PVA glue
- White craft glue that dries clear.
- Sealer
- A clear coat protecting seeds from moisture and insects.
- Tessera
- One piece of a mosaic; here, one seed.
Questions people ask
Which seeds work best?
Dried beans, lentils, split peas and common garden seeds like sunflower and poppy.
What glue should I use?
PVA white glue: it dries clear and holds seeds to a rigid board.
Will the seeds go moldy or attract bugs?
Sealing front and back with a clear acrylic sealer protects them.
Is it safe for children?
With large beans and an adult watching, yes; small seeds are a choking hazard for children under three.
Can I enter seed art in a fair?
Many fairs have categories; the Minnesota State Fair's Crop art rules allow only seeds from Minnesota-grown farm crops and cultivated plants.
Where to go next
- 01Dried flower wreathsMore pictures made from the garden's dried harvest. $45 to start
- 02MicrogreensThe other thing to do with a jar of seeds: sow them. $33 to start
How it compares
| Seed mosaics | Dried flower wreaths | Linocut printing | Papermaking | |
|---|---|---|---|---|
| Start cost | $40 | $45 | $56 | $44 |
| Each month | $4 | $10 | $8 | $3 |
| Space | A table | A table | An inky desk | A kitchen counter |
| Noise | Quiet | Quiet | Quiet | Low |
| First result | 1 evening | 1 afternoon | 1 evening | 1 weekend |
| Mess | Spilled seed | Dropped petals | Ink | Water and pulp |
Sources: Wikipedia, Crop art (seed art, corn palaces, Minnesota State Fair) · Wikipedia, Mosaic · Wikipedia, Abrus precatorius · Wikipedia, Ricinus
Researched and written by the Fjords Team.